Document Import
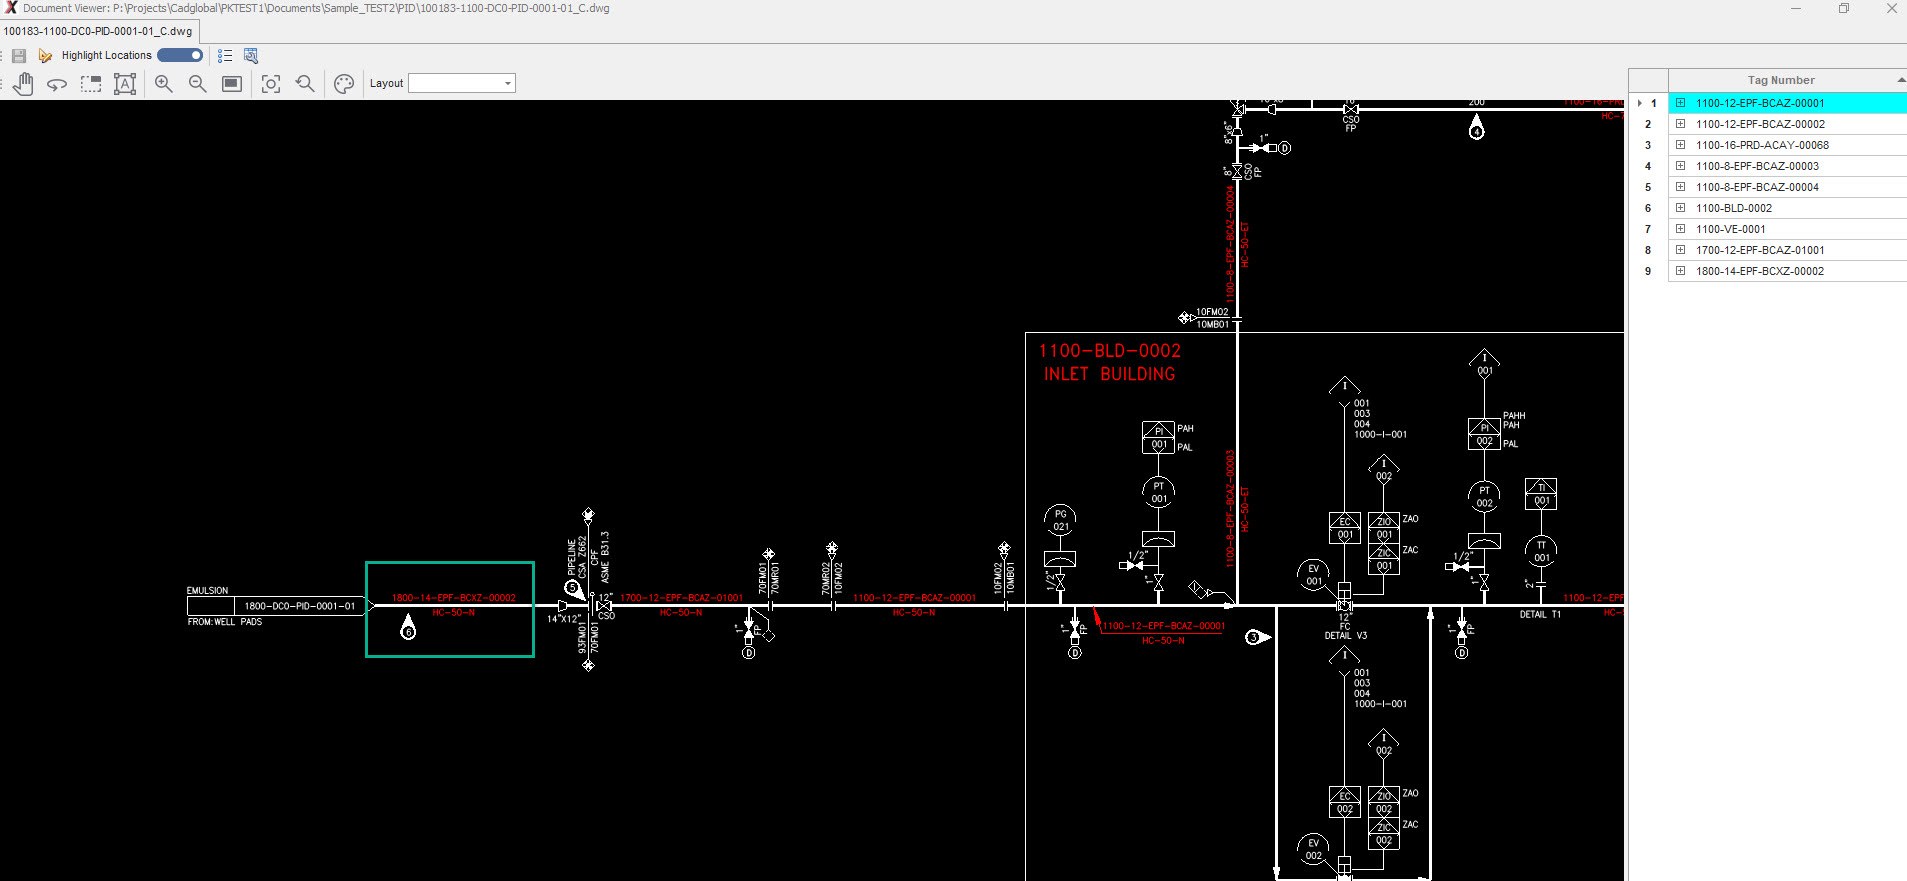
- Reopen the drawing in the document viewer.
- The missing tag should now be picked in the drawing.
Review Imported Drawings
Document Import
Document Scanning
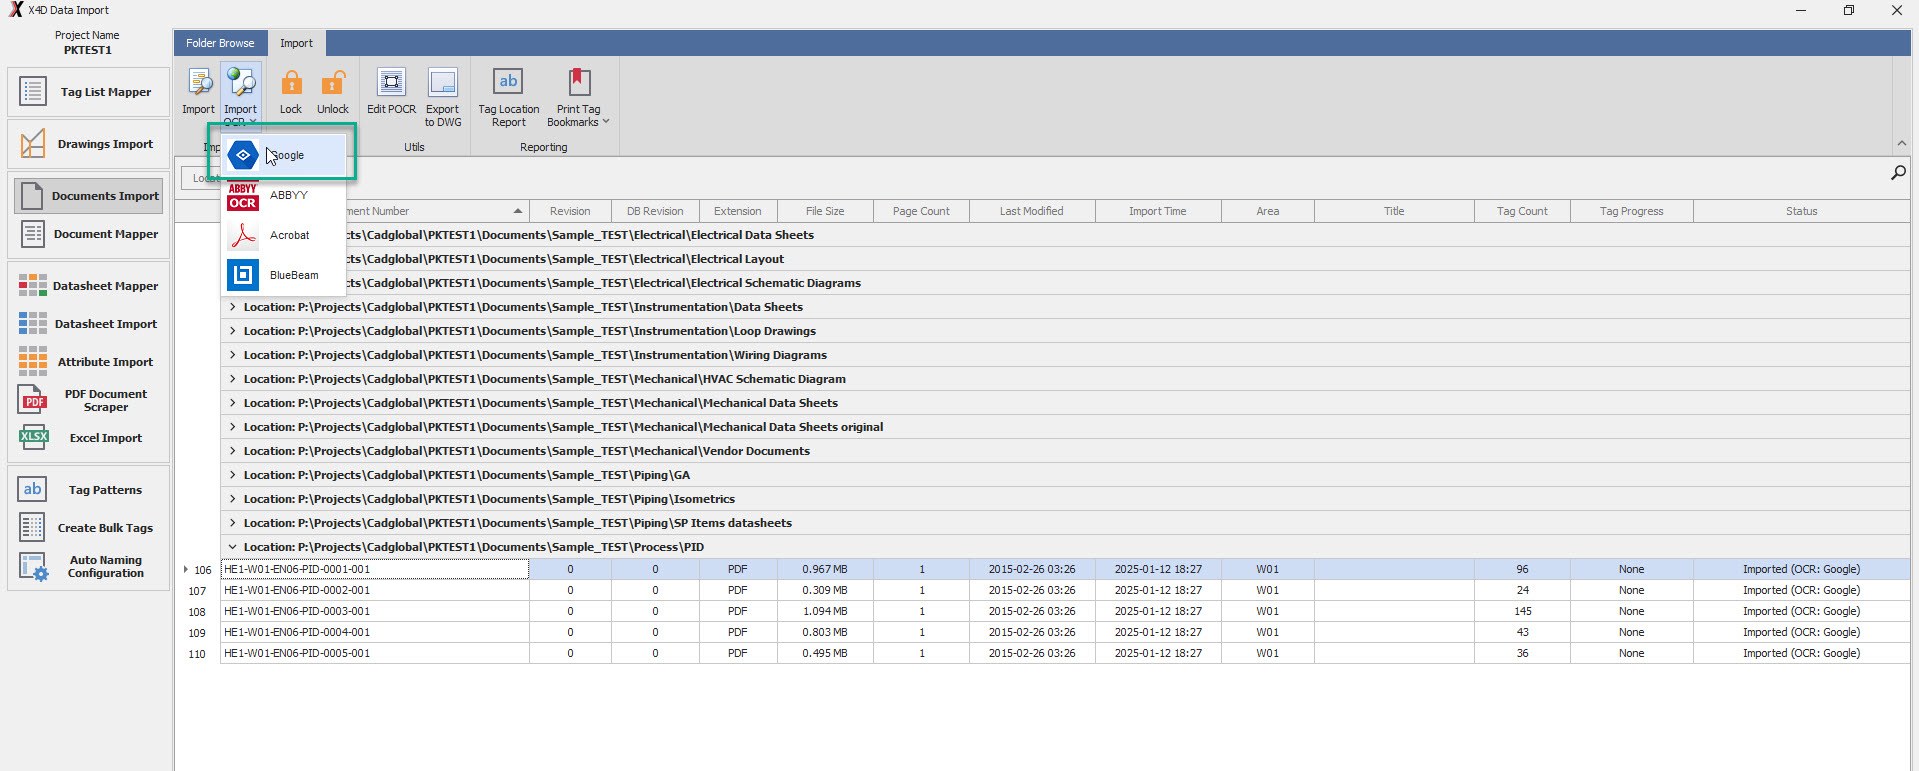
PDF documents needs to be scanned for OCR to process tags and extract attributes from these documents. Document scanning can be either :
- Cloud Scanning :
- Google Scan Supported (License for Google Vision should be available) Filename should be GoogleLicense_PROJECTCODEest1.json. The process to obtain Google license is explained in X4D Administration.
- ABBYY Scan Supported (License for ABBYY api should be available) Filename should be config_PROJECTCODE.json
- In House Scanning :
- Acrobat : For in house scanning, The files can be scanned and result are kept under the file location folder
- BlueBeam : For in house scanning, The files can be scanned and result are kept under the file location folder
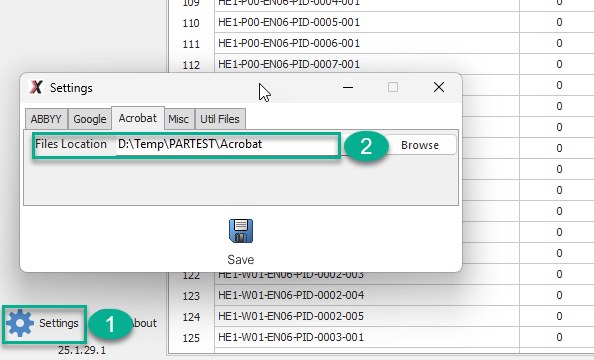
- Location of file folder can be set from the setting menu that can be found next to the X4D Version Stamp.
Native PDF Import for native searchable PDF's import can be used. Please note, Import PDF automatically processes cloud or in house scanning if available.
Cloud OCR Scan
In House OCR Scan
Native PDF Documents
We can use the import button for searchable native PDF files. No scanning is required for these documents.
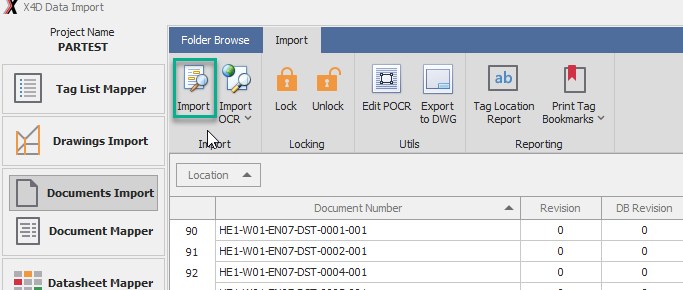
Document Tag Import
How to Import Tags to the PDF Files
- Go to Document Import tab and select the PDFs where you want to import all the tags.
- Enter the Area Code for the selected documents.
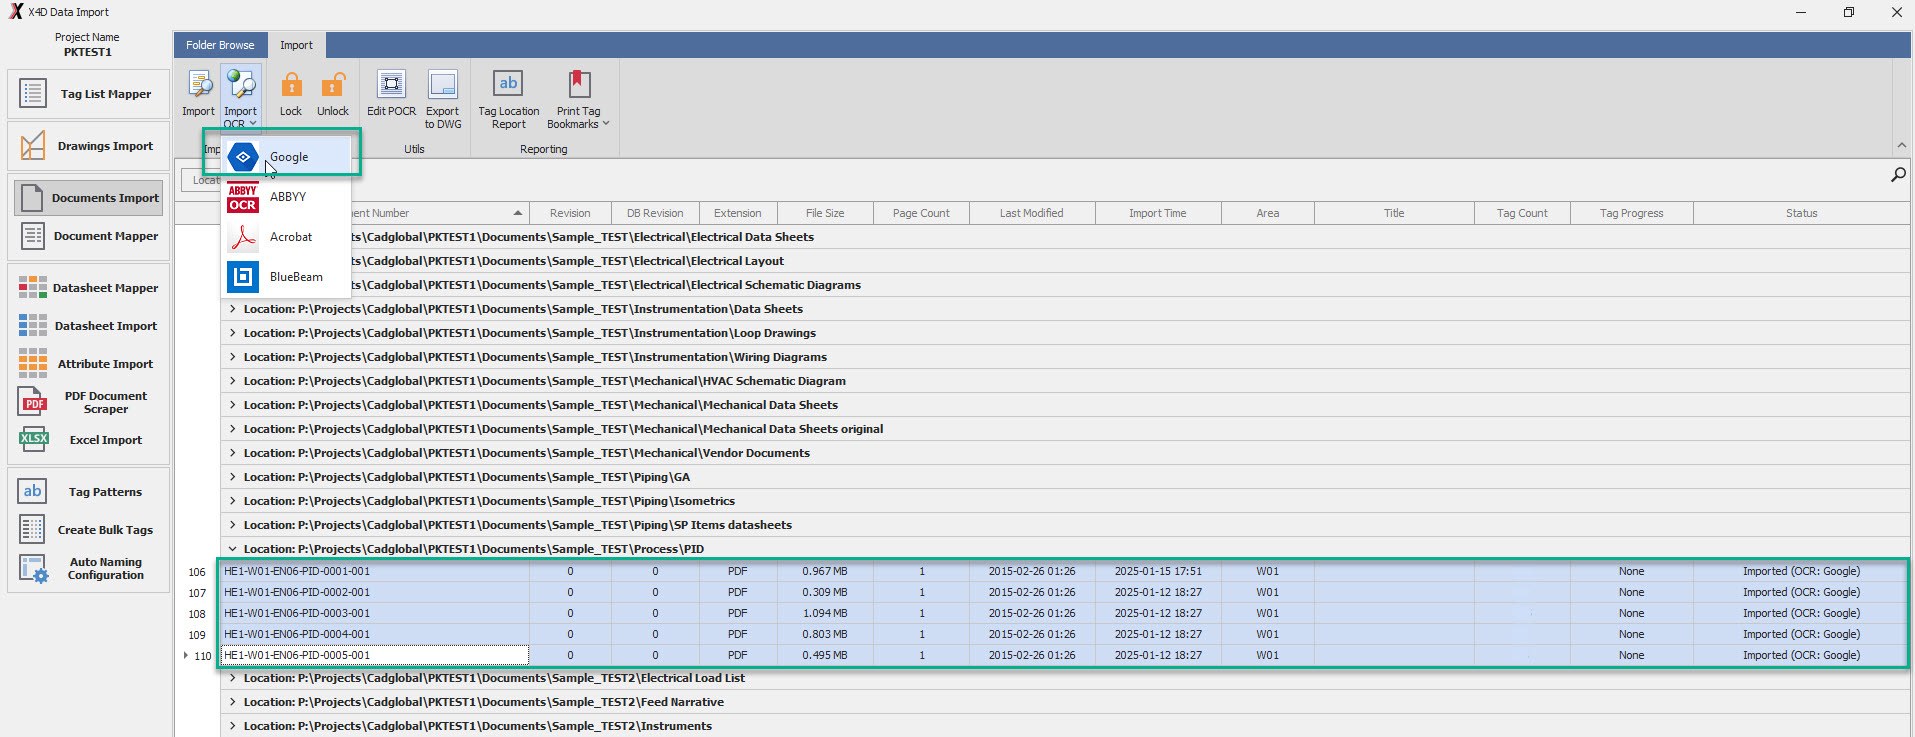
- Click on Import OCR - Google (please note that Importing files can be a time consuming task, and it may take
longer time for files with bigger Size or large Tag Count)
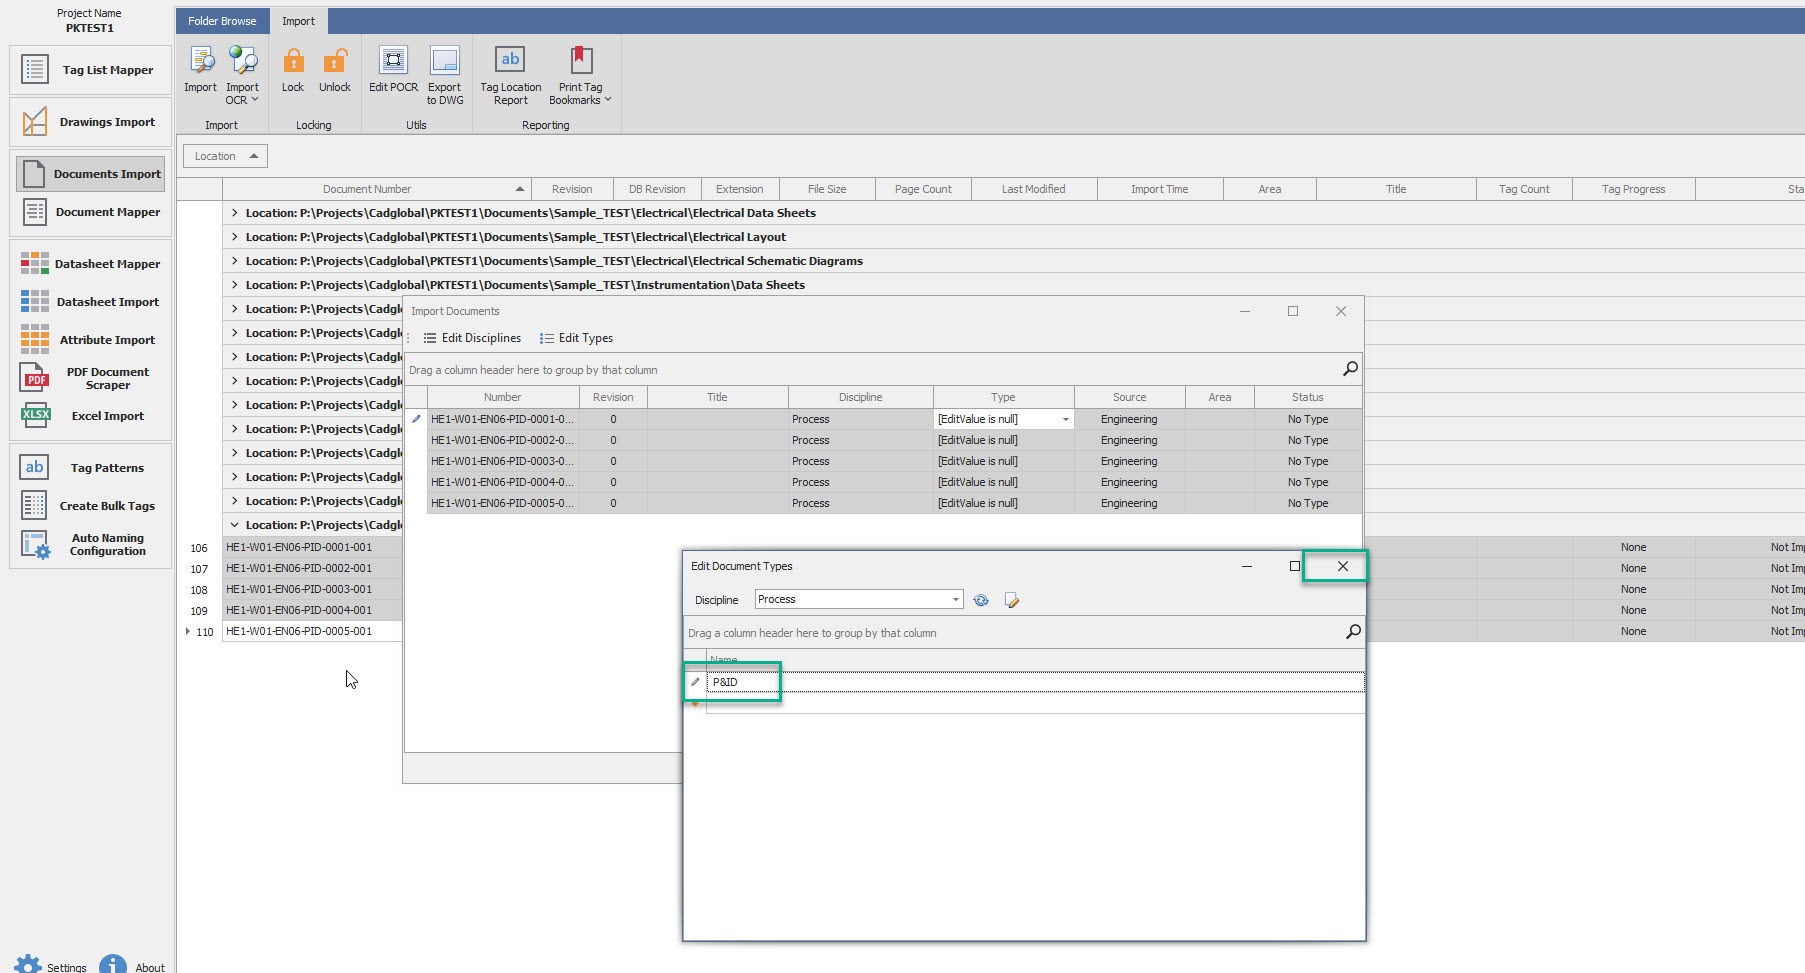
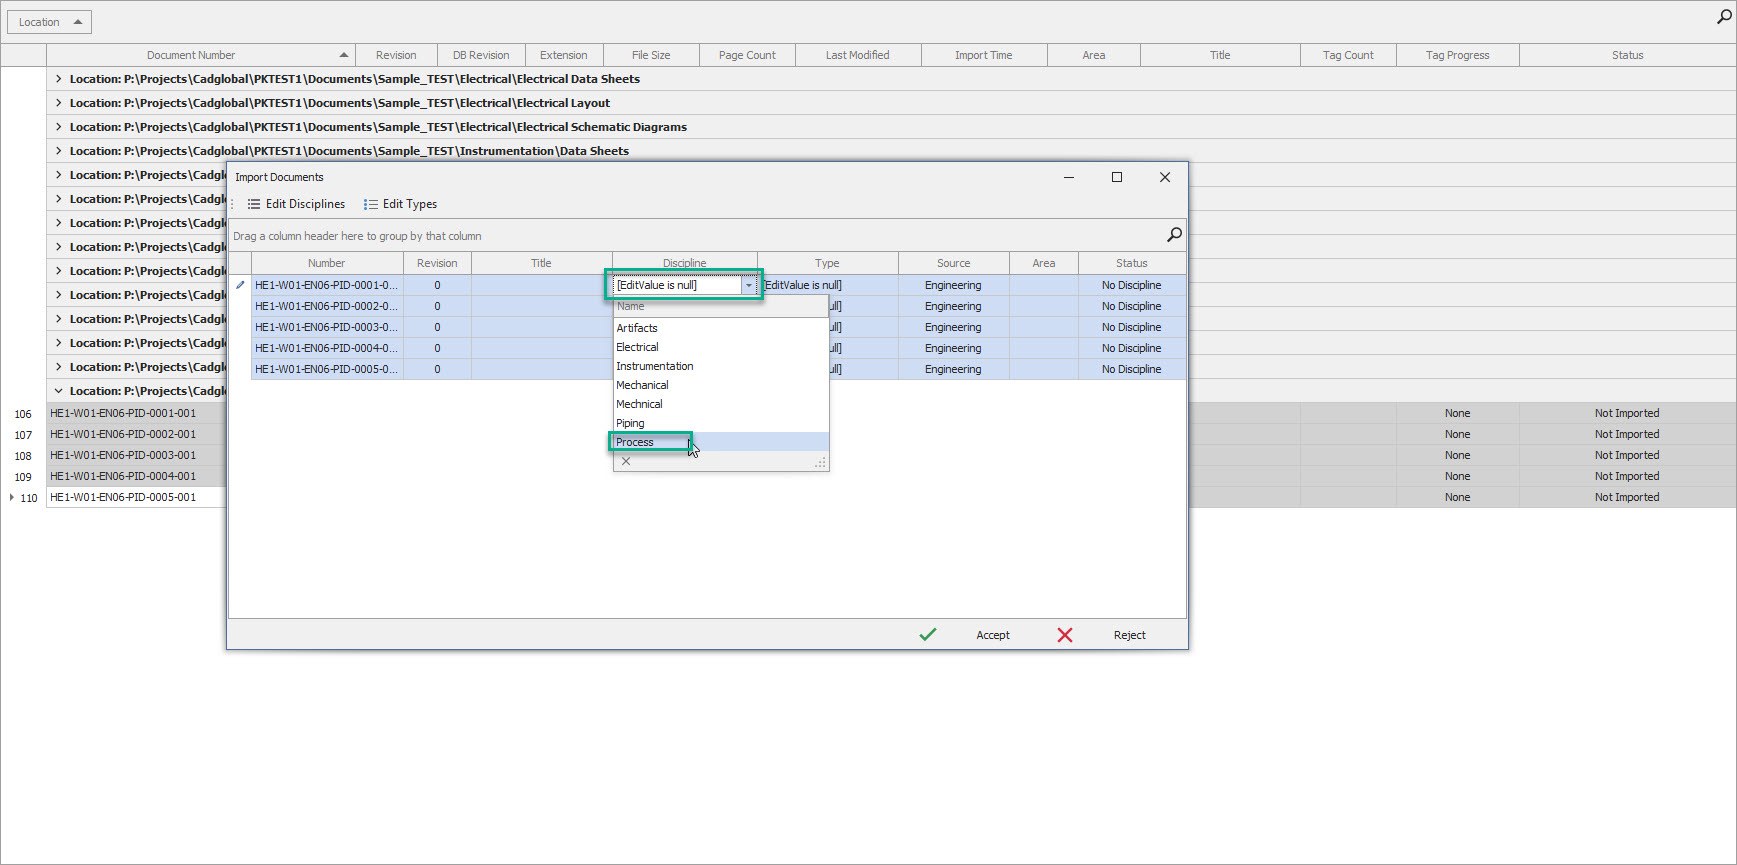
- Select the files and select the Discipline and type for the files being imported for the first time.
-
Select the dropdown in the Type column and define the desired types under the Discipline.
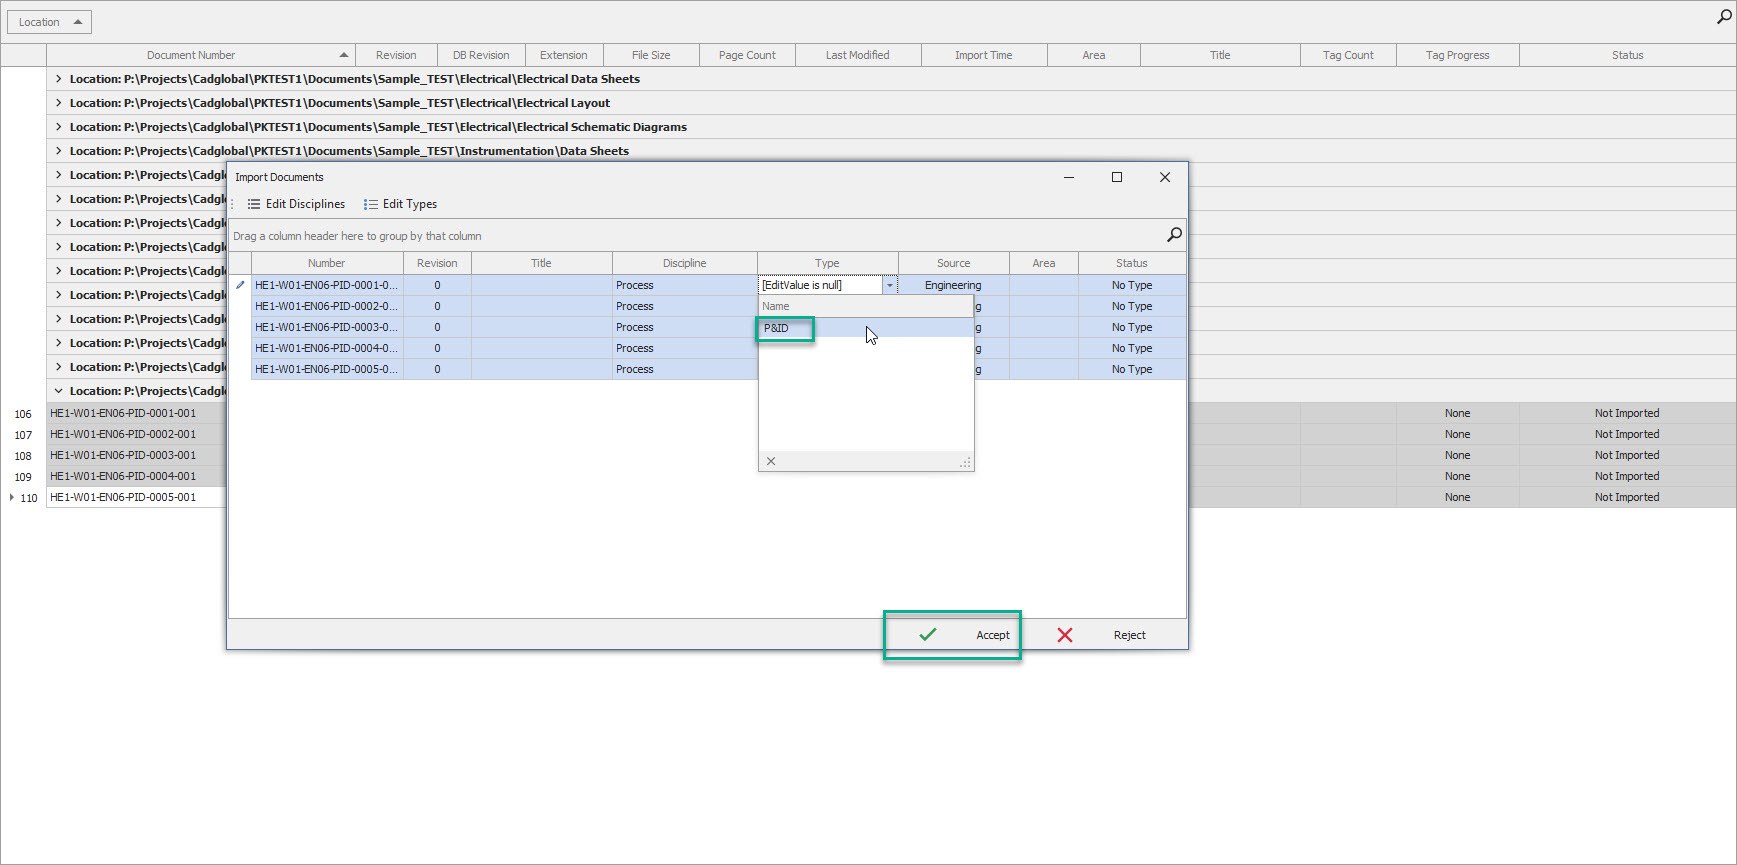
-
Once Done, select the desired Type and Discipline and click Accept.

- Once done, system would give a pop-up confirmation for the same.
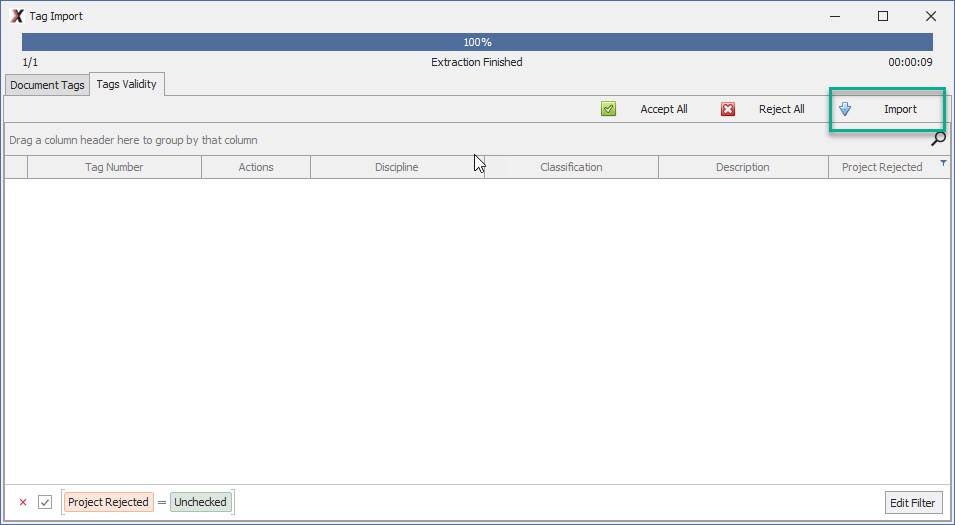
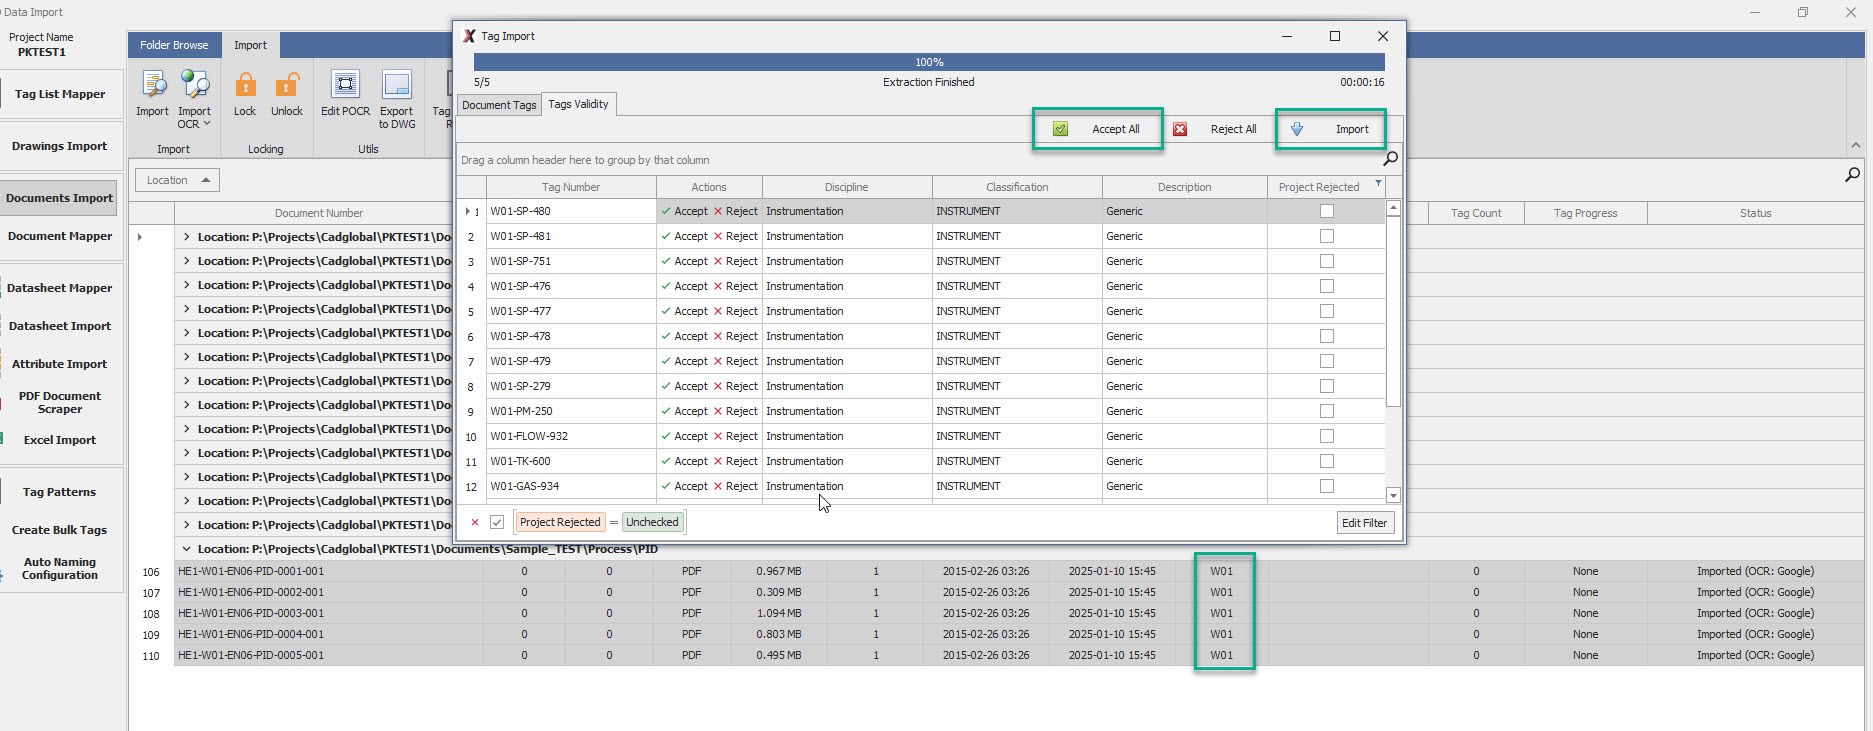
- Add Area Code in Column Area. After clicking OK, navigate to the Tag Validity Tag.
- Click Accept All and Import and wait for the window to close. (Do not close the window manually else the tags
may not get imported properly)
Import Tags
How to Import Tags to the PDF Files
- Go to Document Import tab and select the PDFs where you want to import all the tags.
- Enter the Area Code for the selected documents.
- Click on Import OCR - Google (please note that Importing files can be a time consuming task, and it may take
longer time for files with bigger Size or large Tag Count)
- Select the files and select the Discipline and type for the files being imported for the first time.

-
Select the dropdown in the Type column and define the desired types under the Discipline.
-
Once Done, select the desired Type and Discipline and click Accept.

- Once done, system would give a pop-up confirmation for the same.
- Add Area Code in Column Area. After clicking OK, navigate to the Tag Validity Tag.
- Click Accept All and Import and wait for the window to close. (Do not close the window manually else the tags
may not get imported properly)
Add Tags Manually to PDF
How to add Tags Manually to PDF Sometimes tags are writen in a pretty complex manner to fit the space. For these tags, Tag Patterns may fail. In such cases, tags can be marked manually in the PDF documents aswell using the process below :


-
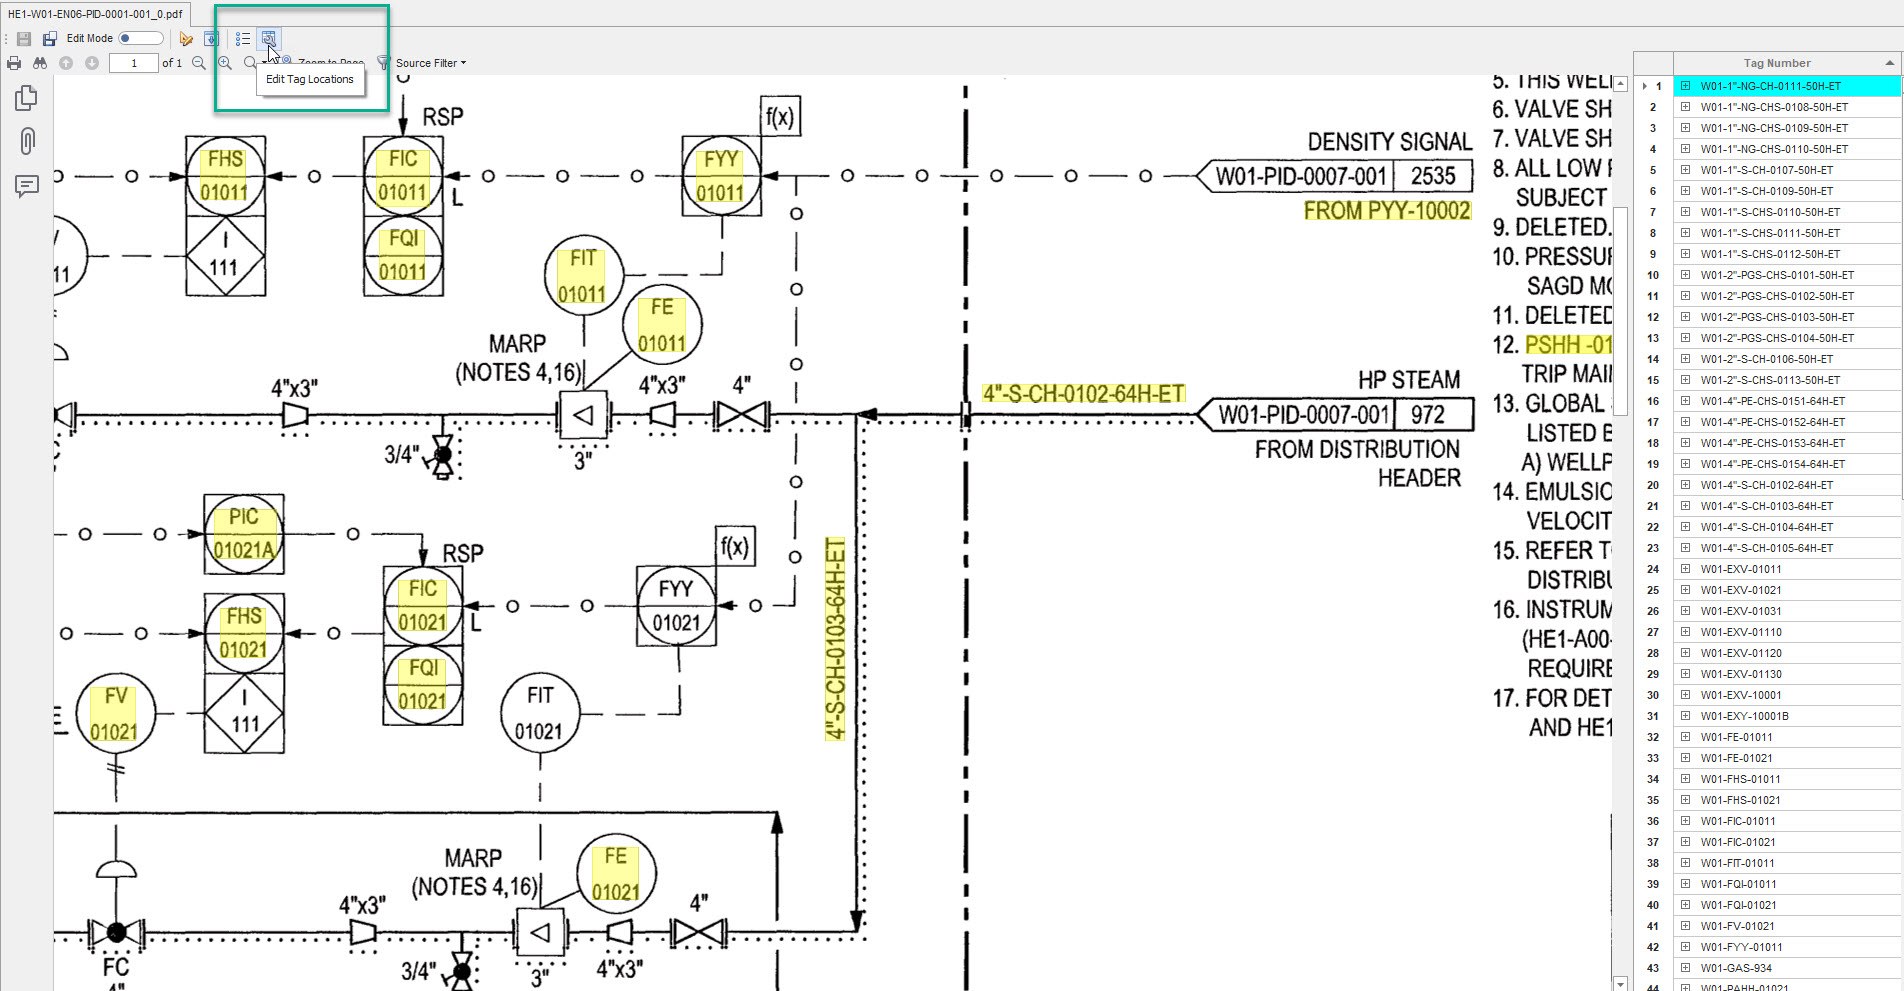
Open the File and click on Edit Tag Locations button located in the top bar of the document viewer
-
This should launch the Editing Locations Window.
-
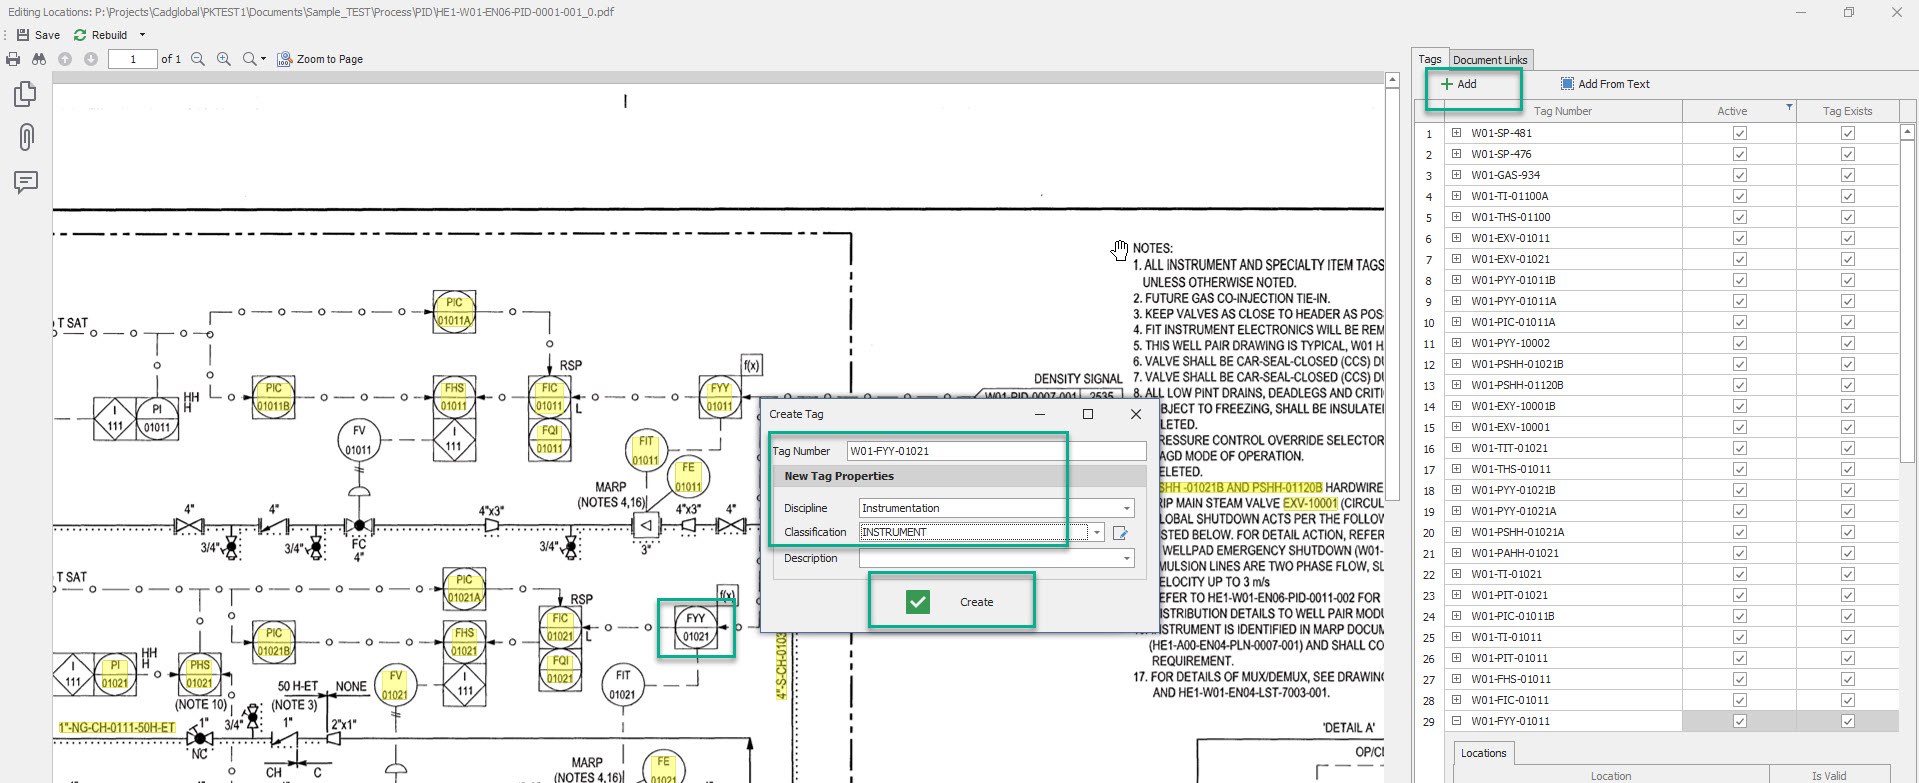
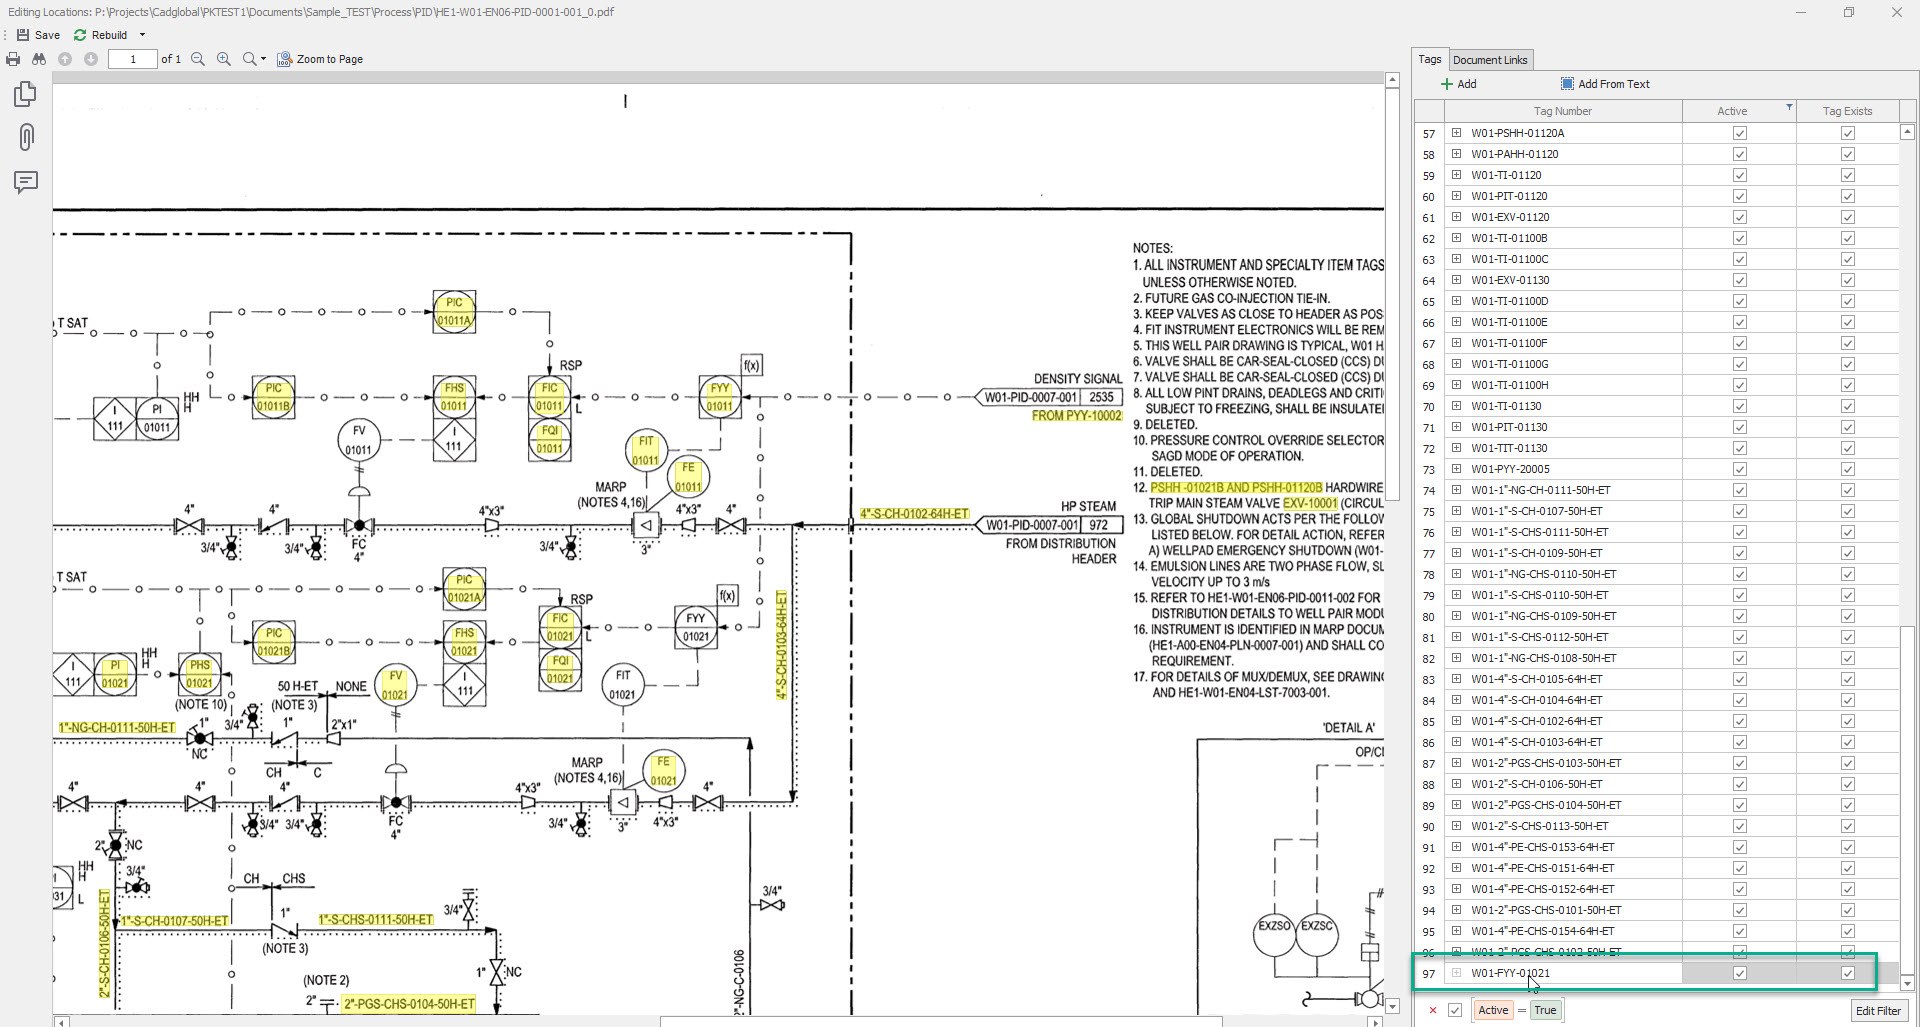
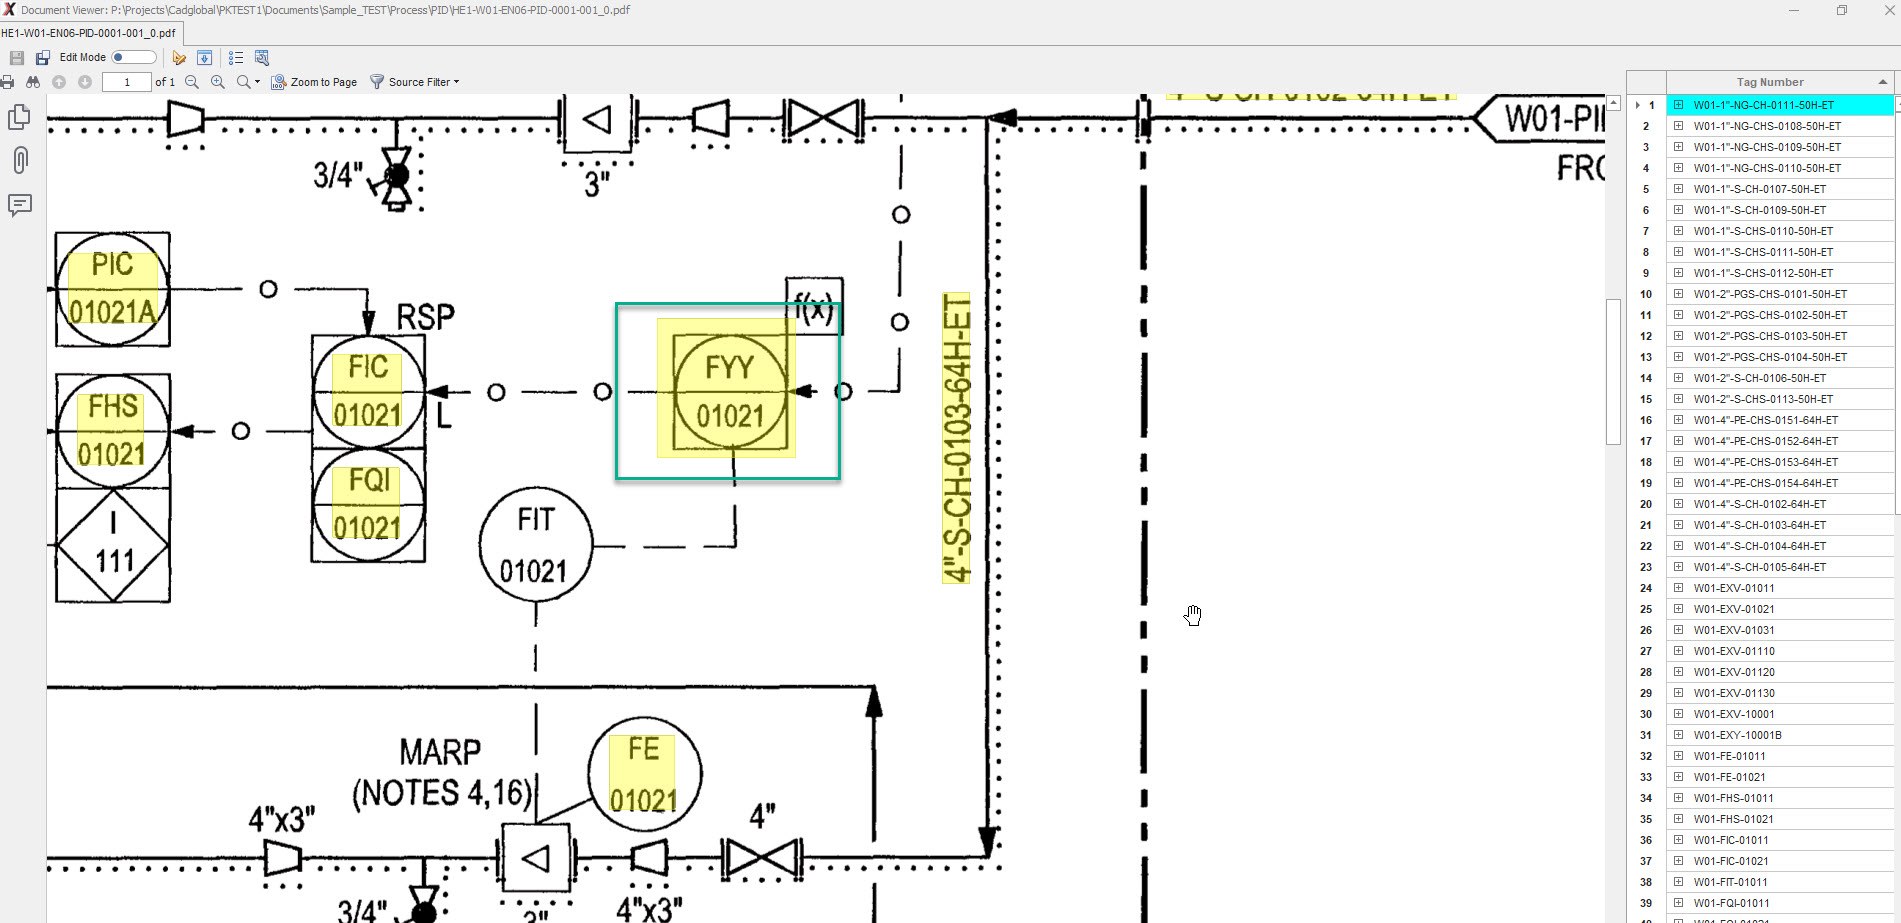
In the below scenario, to add the missing tag W01-FYY-01021 manually, click on the Add button in the Tag List
on the right.
- Enter the tag number, define the Discipline and Classification for the tag.
- Once all details are entered, Click Create.
-
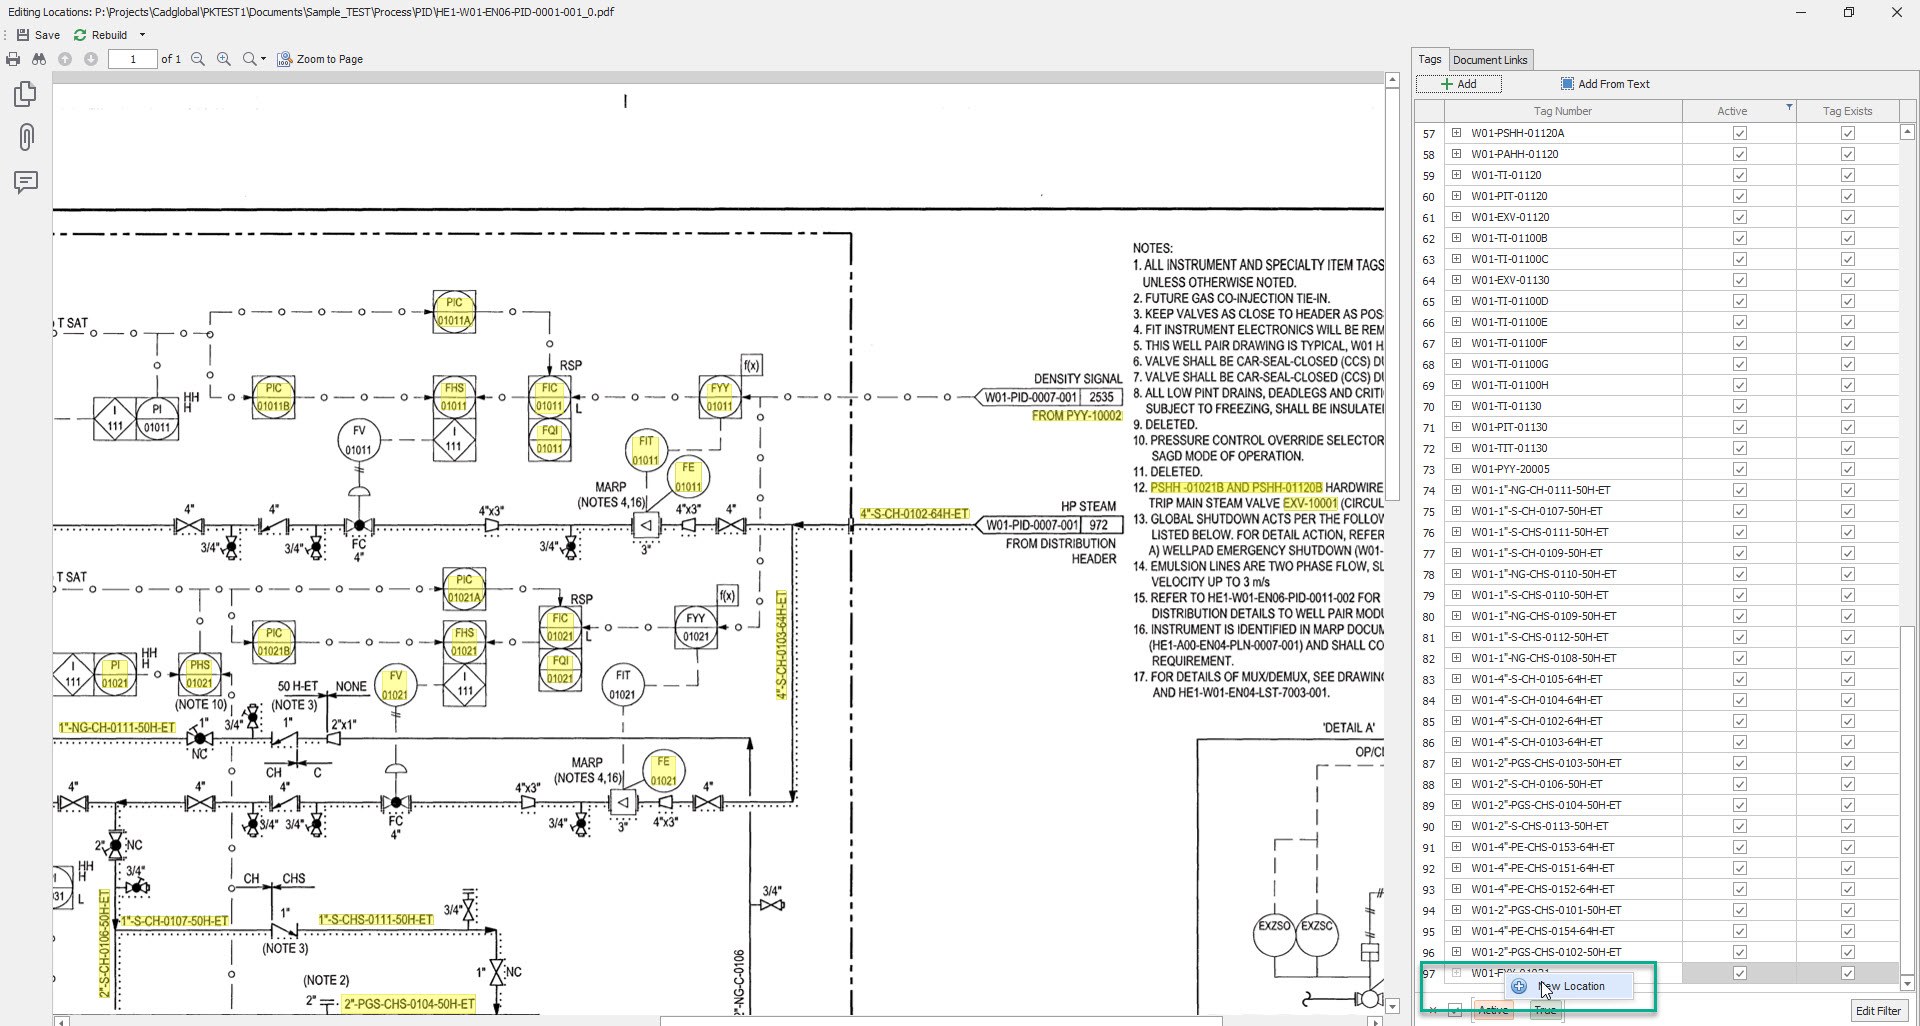
This should create the missing tag and now it would appear at the bottom of the Tag list as shown below.
-
Right click on the newly created tag and click on New Location.
-
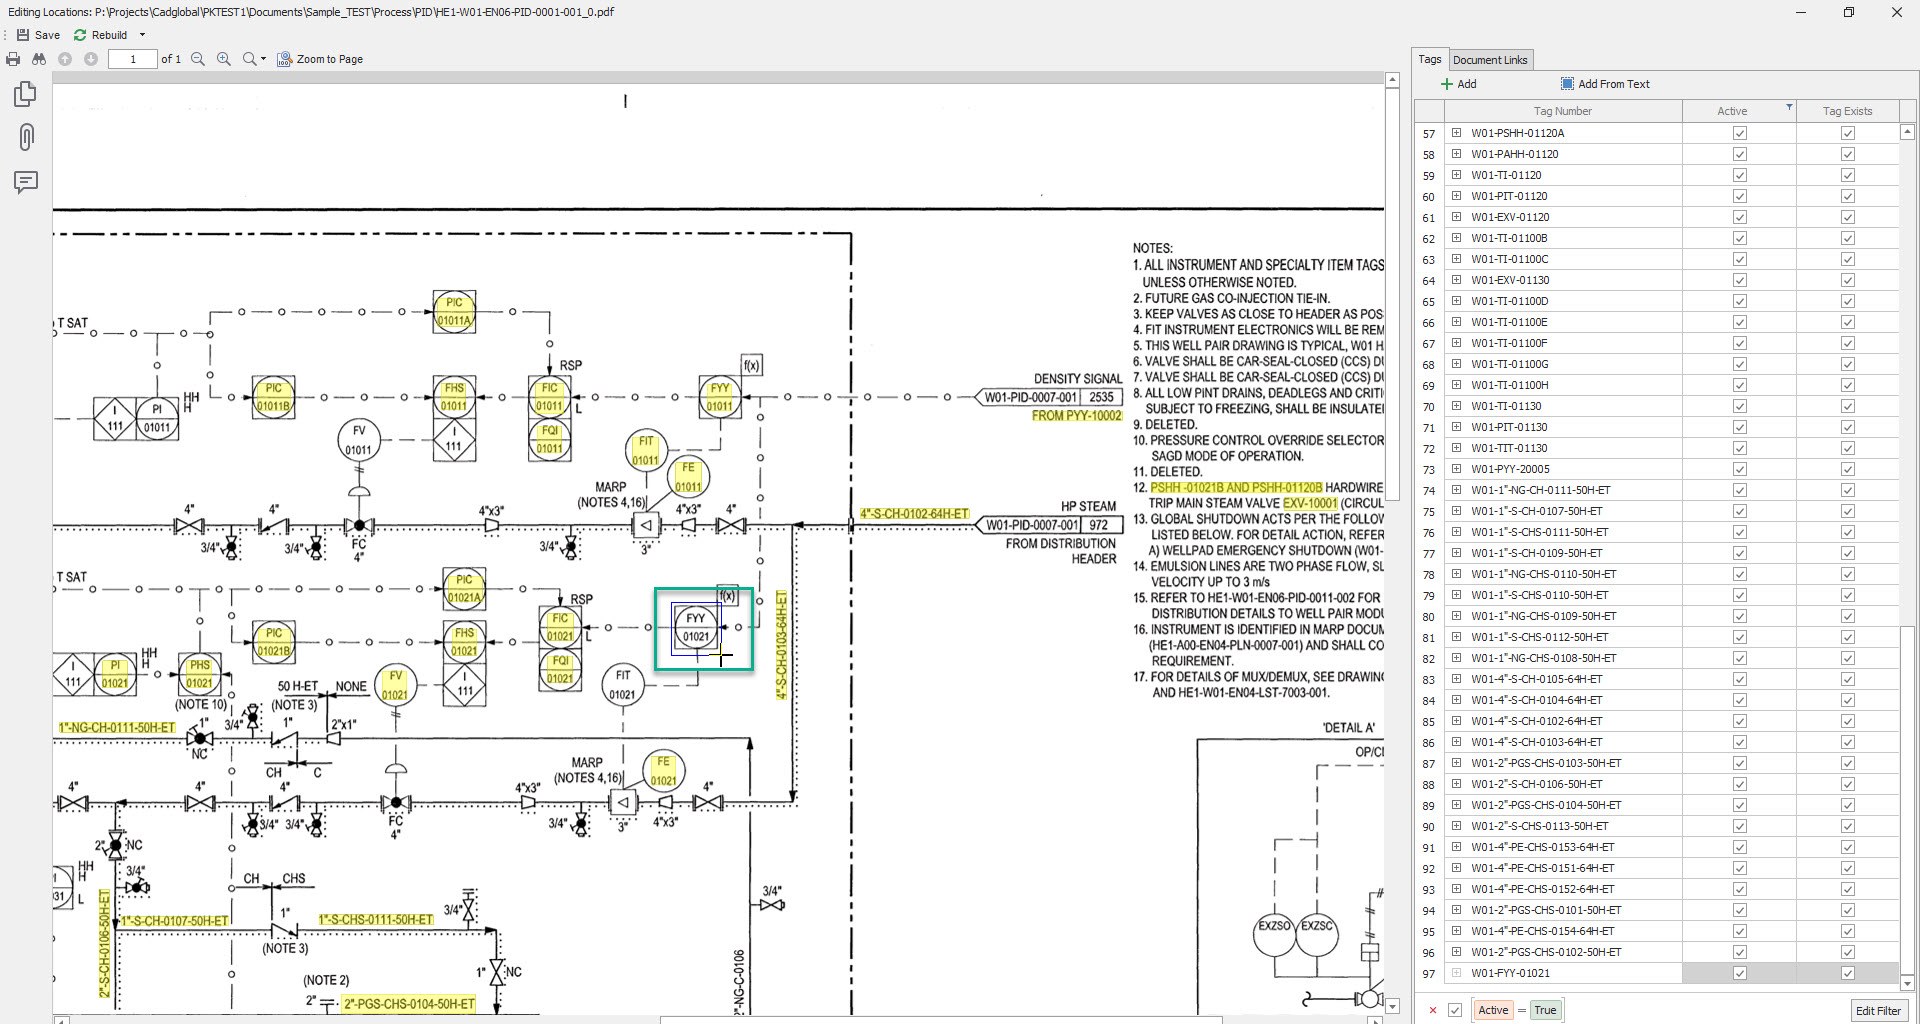
Make a selection around the missing tag on the PDF.
-
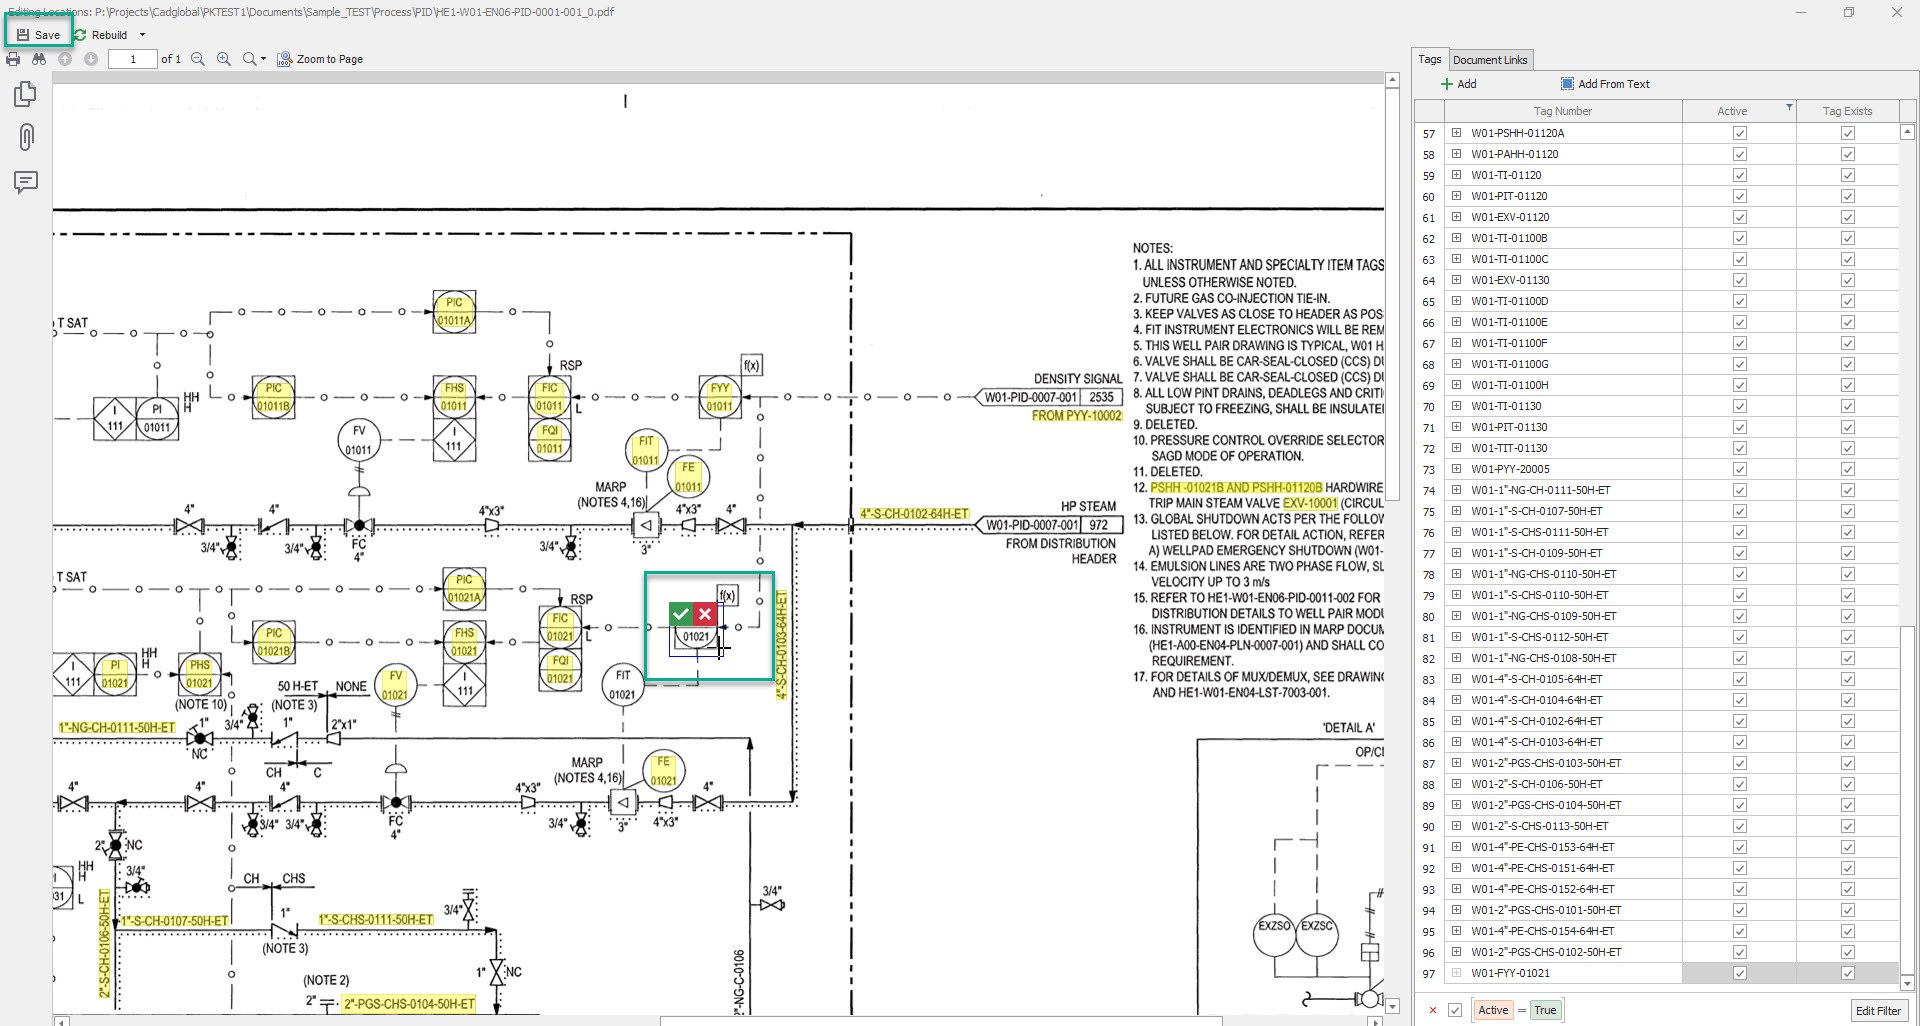
Once the location selection for the tag is made, click on the Green Check mark to accept the location.
-
This would sucessfully add the location for the Manually Created tag that was missing.
- After saving the Manually created tag, go to main file and check. The missing Tag should appear now.
Add Tags Manually in Microcsoft Word Files
Add Tags Manually in Microcsoft Excel Files
Use Edit POCR
How to use Edit POCR
The PDF Scans however are getting imporved but still they are not 100% accurate. To imporve the accuracy of the scan, some of the OCR text can be fixed using Edit POCR option in X4D Data Import. The updated POCR files are saved within X4D for tag or tag attributes processing. Unless the document is forcefully scanned again (SHIFT + IMPORT) the scans are always reused. This is done to save cost in cloud scanning.
-
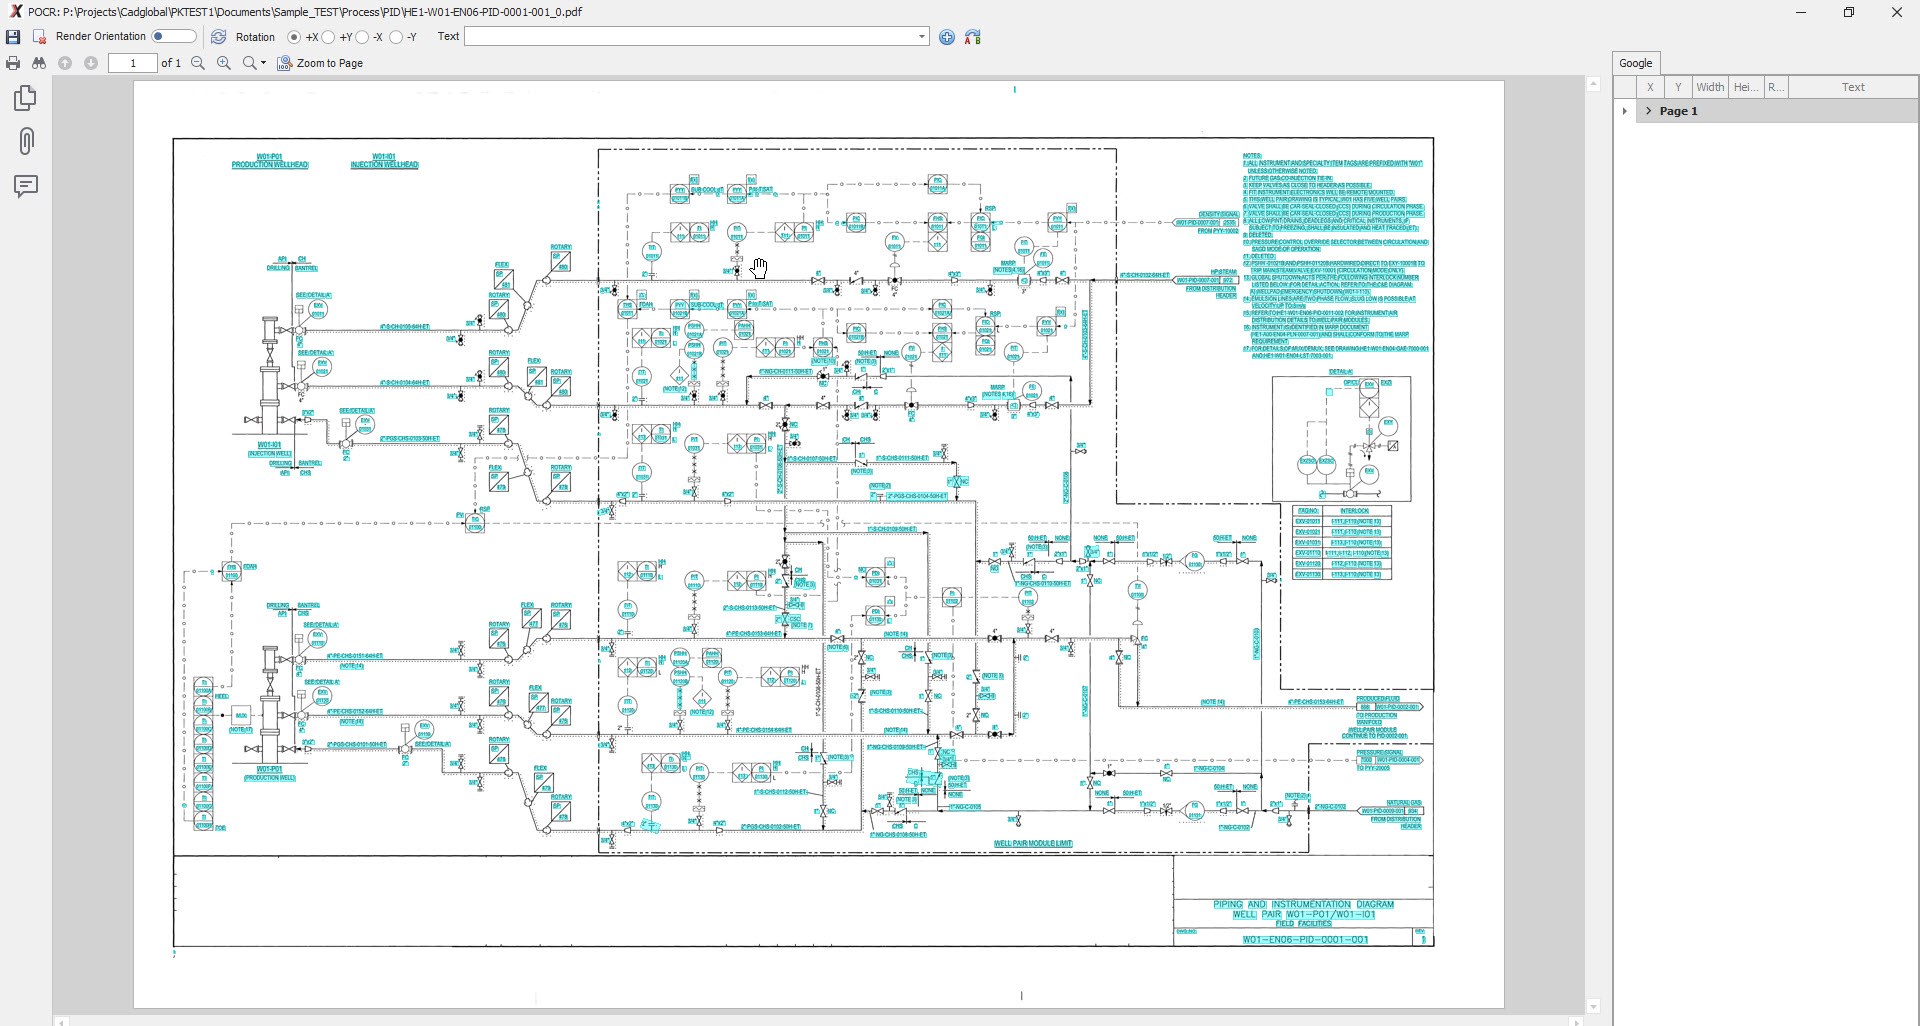
Select the File for which we need to check the POCR and click on Edit POCR on the top.
-
This should open the File POCR window.
-
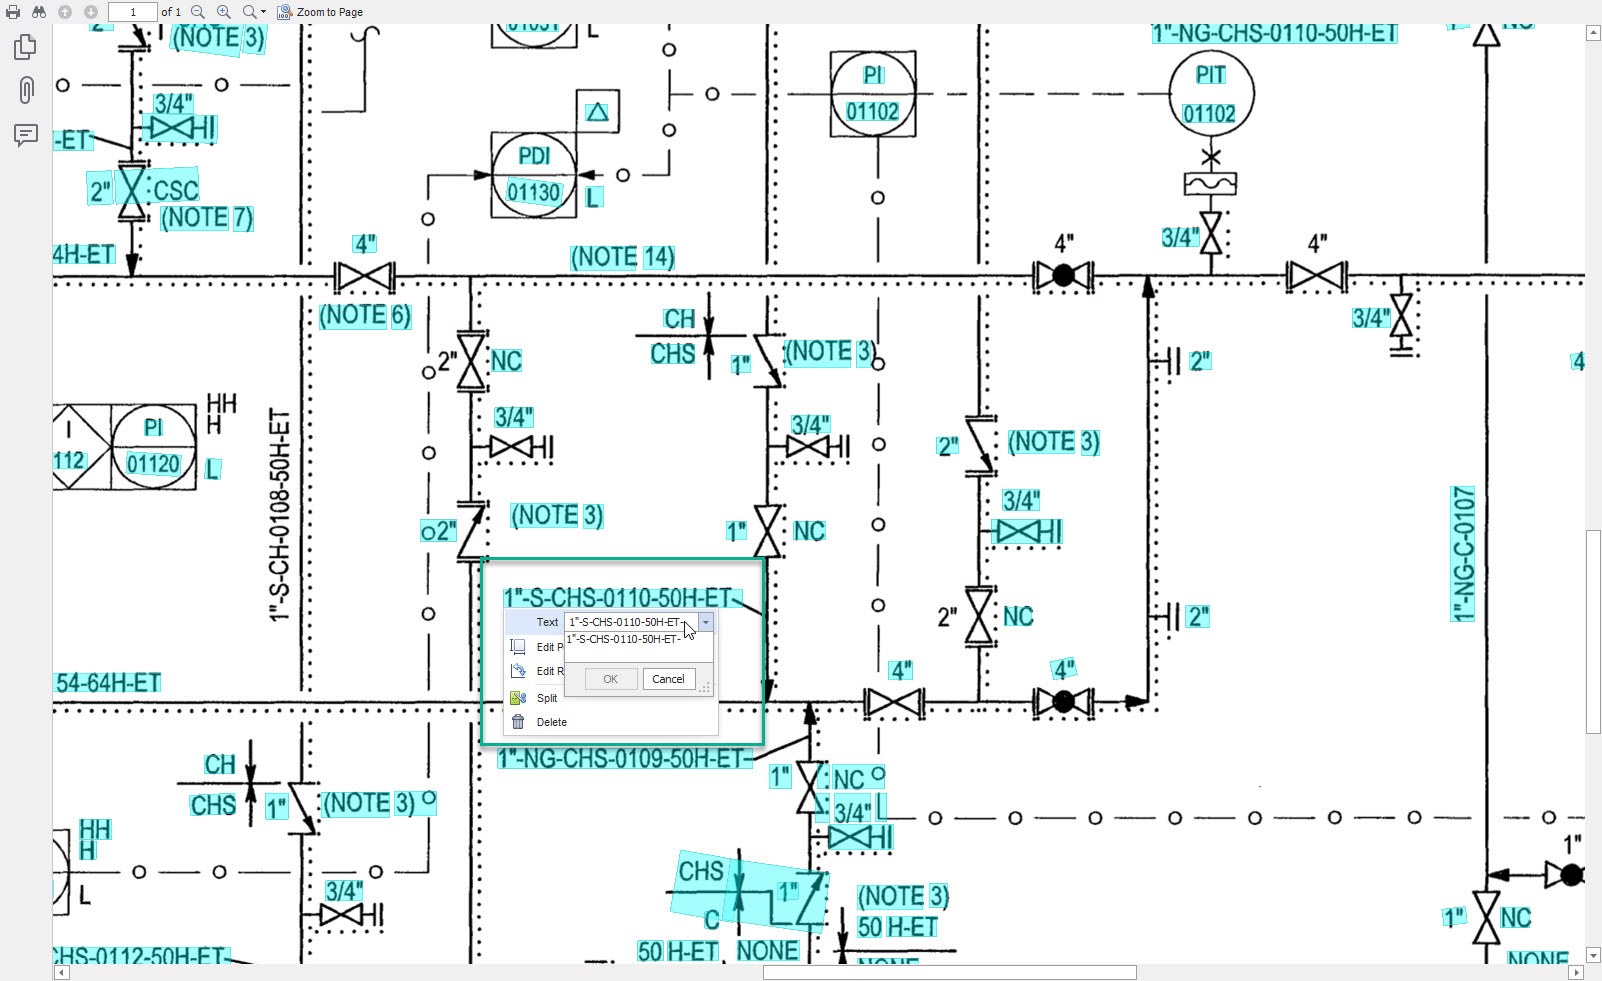
Right click on the Tag which is required to be corrected.
-
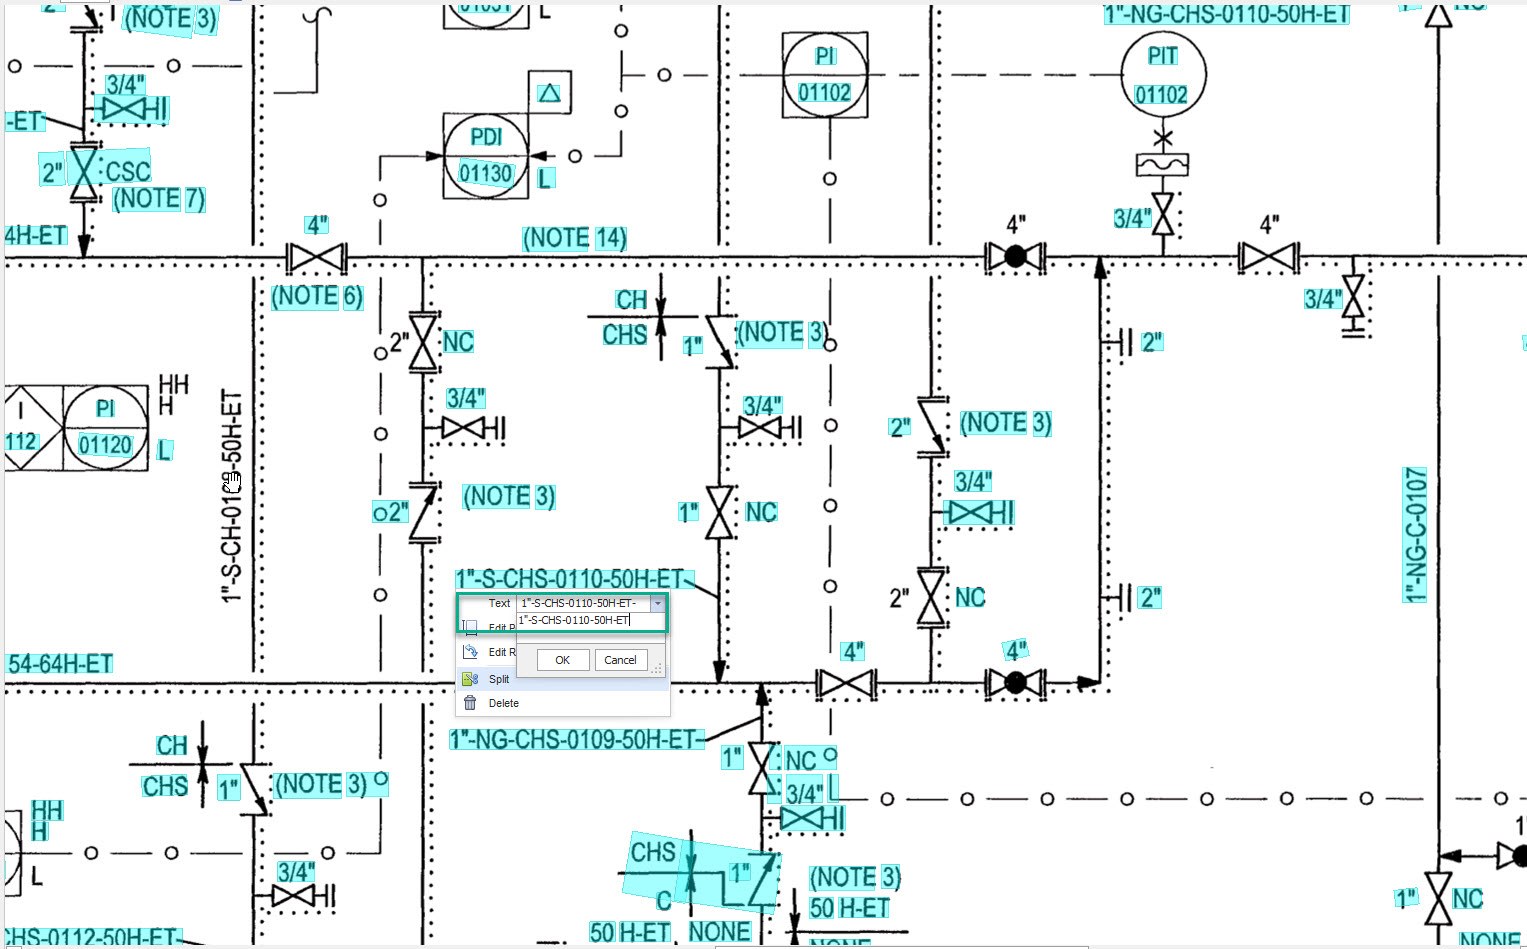
Edit the text as required.
-
In the below instance, the tag should be 1"-S-CHS-0110-50H-ET instead of 1"-S-CHS-0110-50H-ET-.
-
Make the necessary correction by removing “-“ from the end and click OK.

- Once all necessary changes are made, Click on the save button on the top right and close the POCR
Window.
- Once done with Editing the POCR, import the File again so the changes made can be reflected in the file.
-
The Tag Import may not come up with fresh new tags, as the tag might have been imported in the initial Import.
-
Once the file is imported again, you can cross check that the tag to which the changes were made in the POCR is
being picked by the system or not.