Create a Project
Setup X4D Project
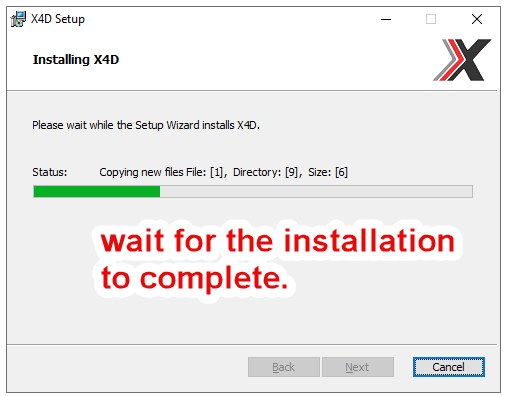
X4D Install
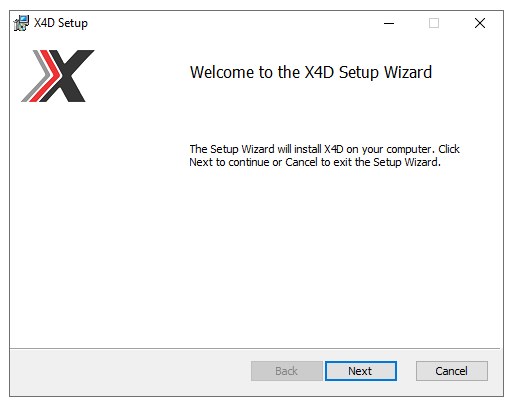
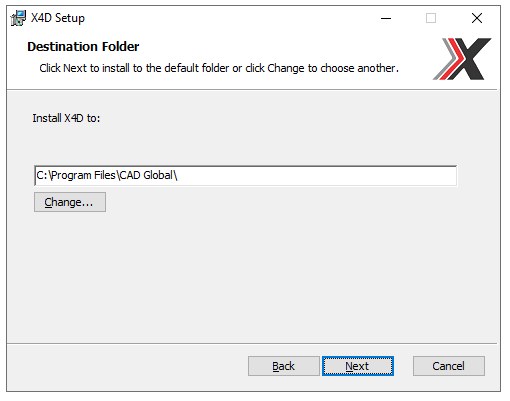
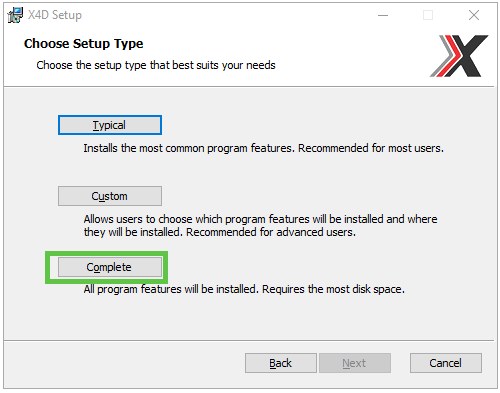
Standard Installation:
NOTE: You should get the license for the X4D Project before proceeding.
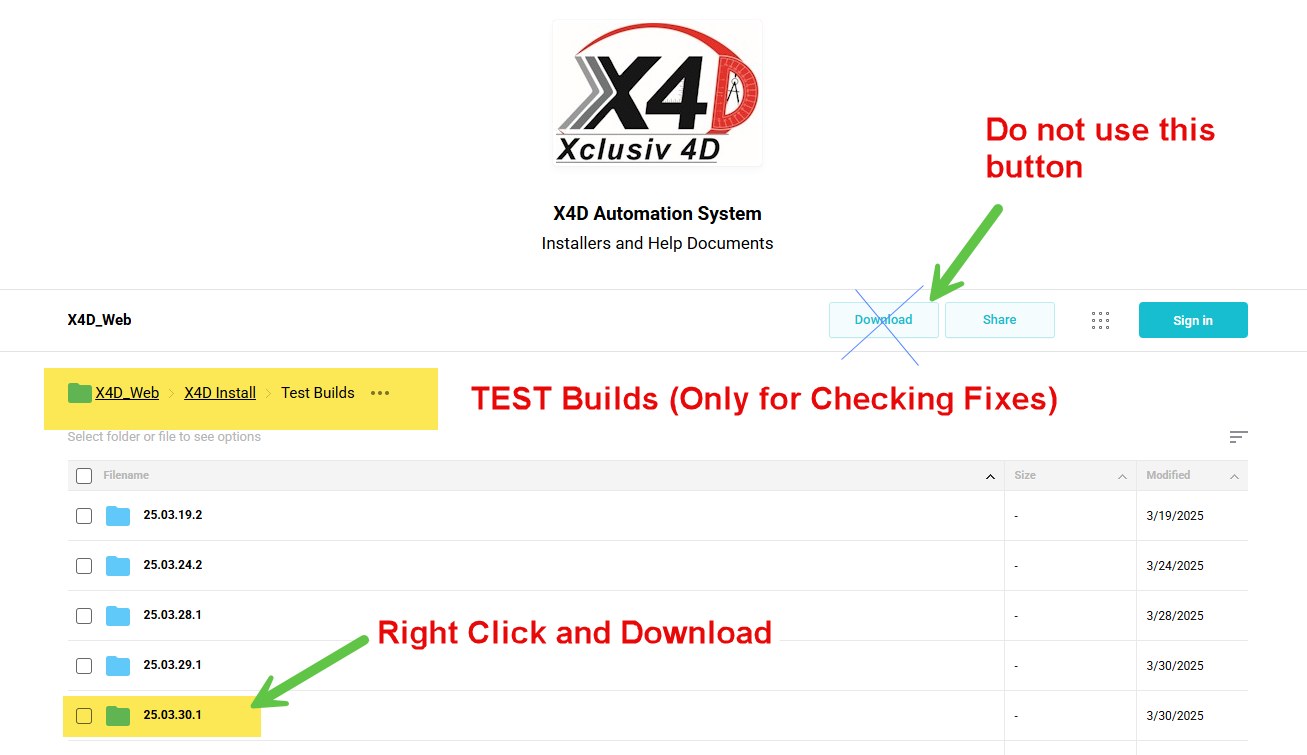
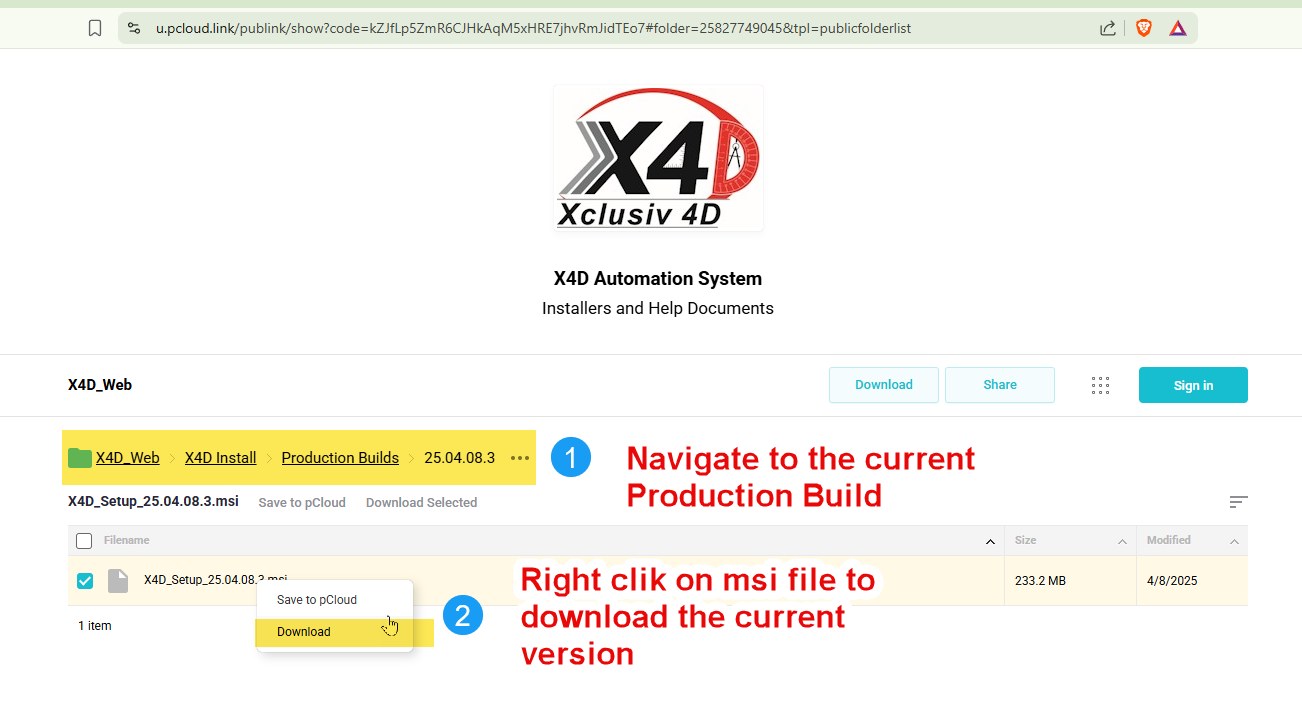
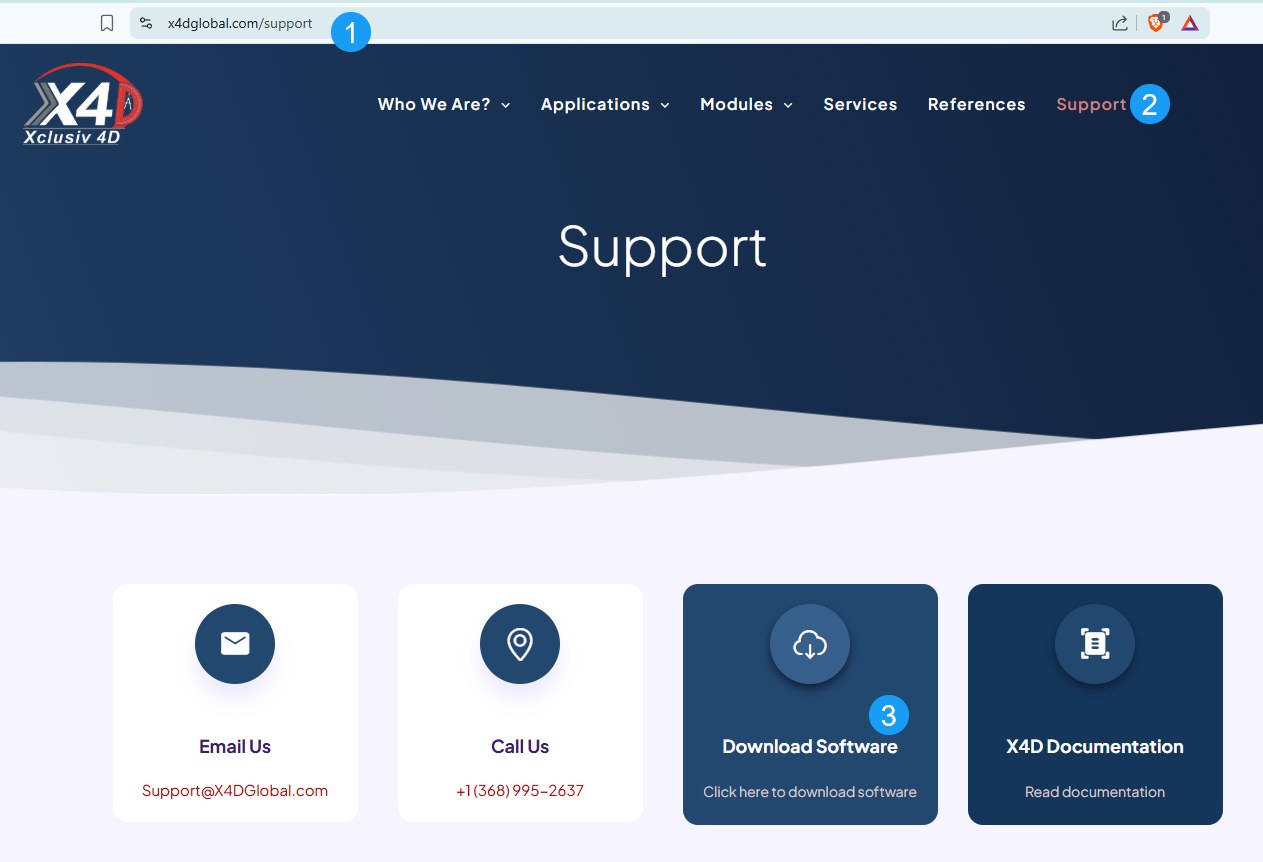
https://X4DGlobal.com The current version of X4D can be downloaded from Support page:

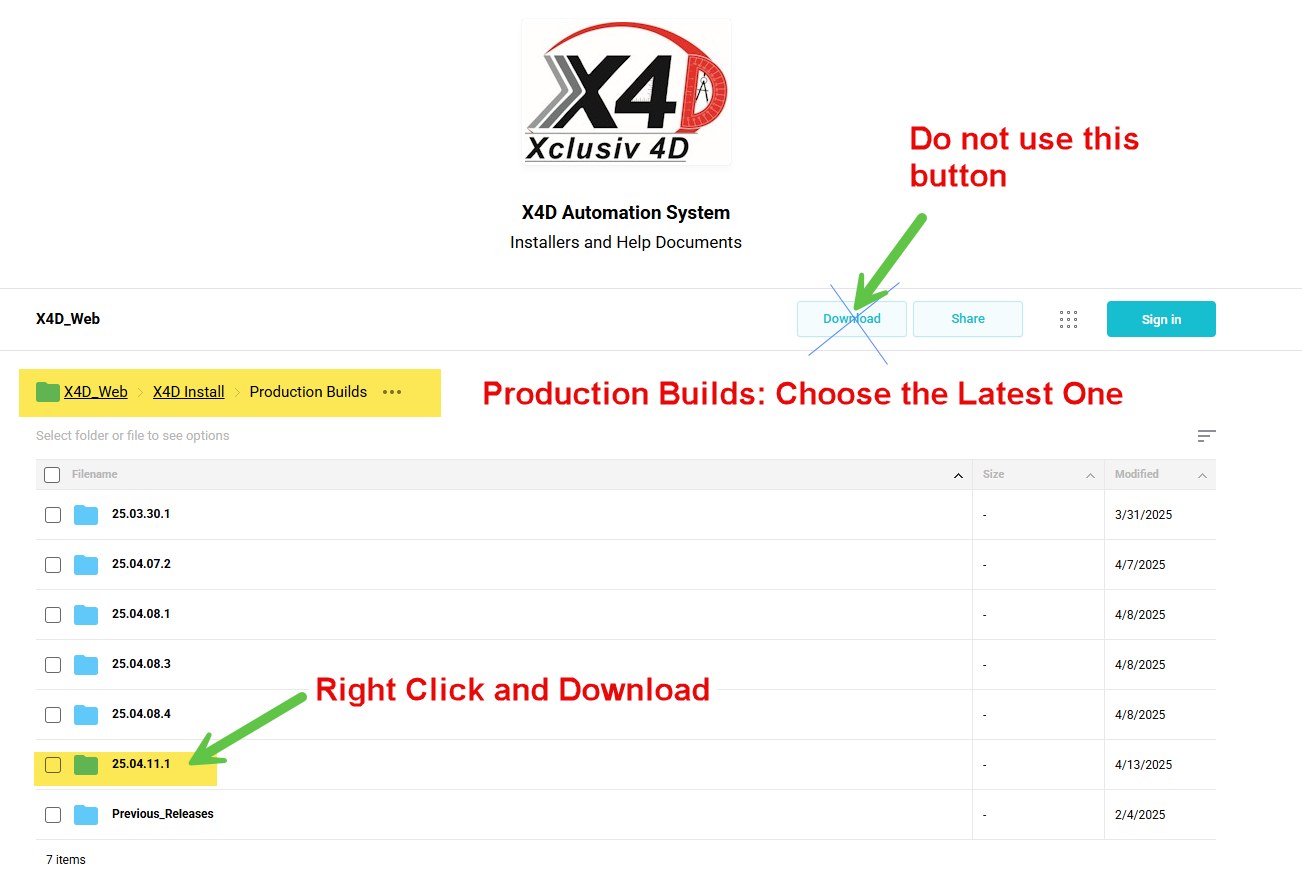
NOTE: To Download the file, right click on th MSI file and click download
Advance Installation: In case of any issue to be reported to X4D Global for Project Install or Upgrade => Please use the installation using Command Line to get log file
Installation with Log file: msiexec /i "X4D_Setup_25.04.07.2.msi" /L*vx! "install.log"
Setup License and Project
Setting up the License File X4D License File:
- Copy the provided X4D_License file to an Appropriate network location, accessible to all users
- In our example, we are copying License to folder => P:\Projects\Cadglobal\LicenseAll\
Google License file
- Get th Google Vision License file
- Rename the file as GoogleLicense_ProjectCode.json
- Copy the file in the same folder as the X4D License file
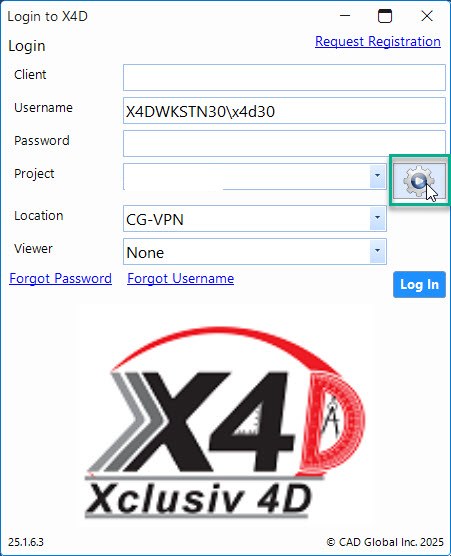
Open X4D Core Application:
Click on the Settings icon.
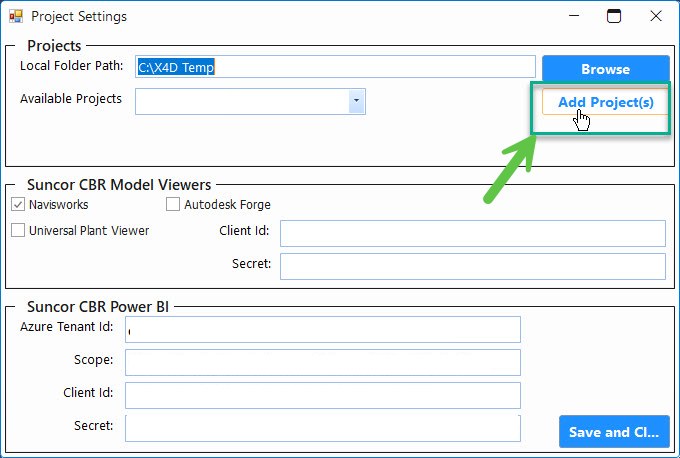
- Click on Add Project(s)
-
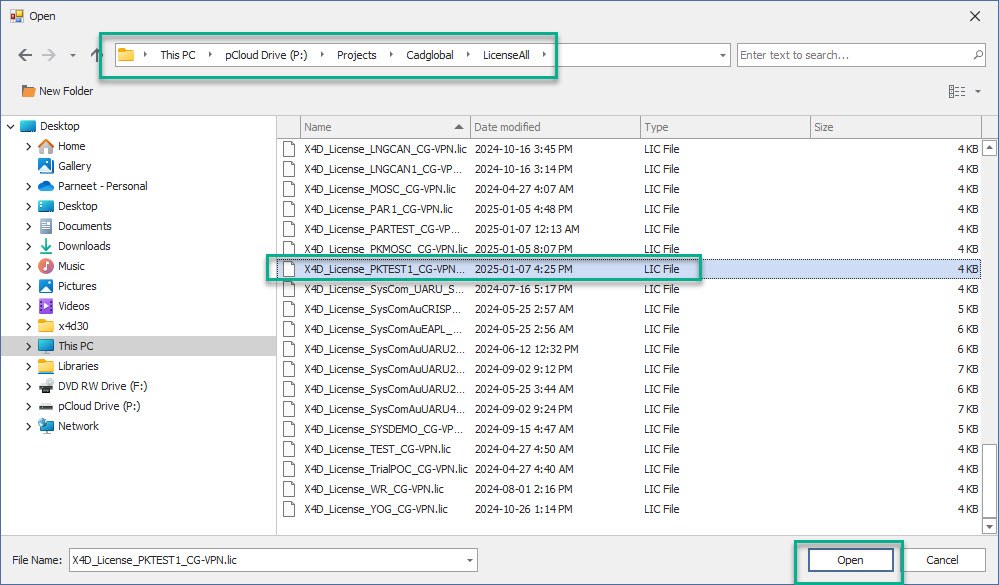
Select the X4D License of your Project from the following path P:\Projects\Cadglobal\LicenseAll and click Open.
-
Click on Save and Close
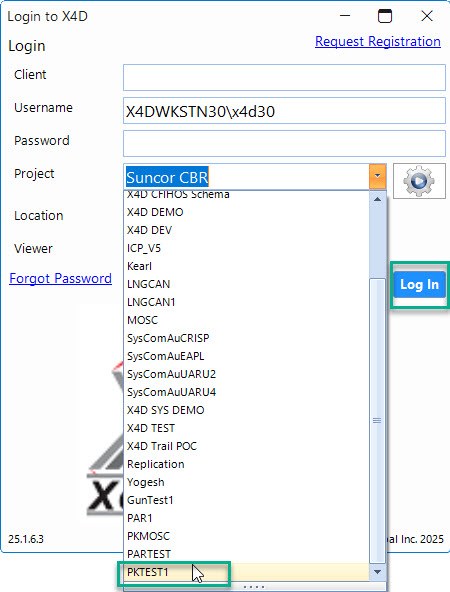
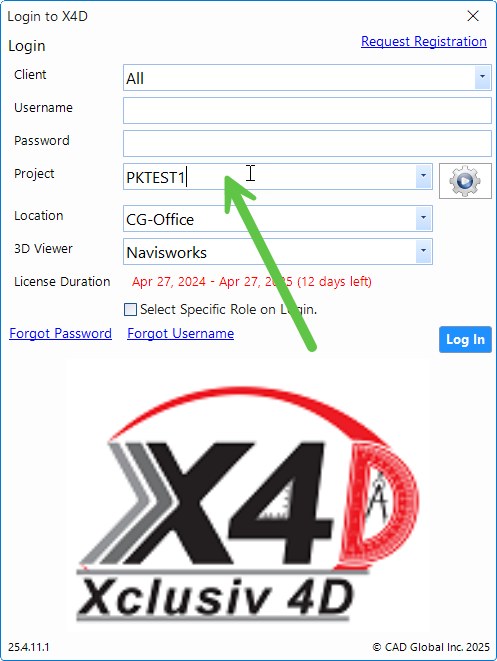
The Project shall now appear in the Project drop-down List.

- Now Close the X4D and Update Database.
Steps to Upgrade Database
Steps to update the Database
- Get the current version Installer for the Latest version of X4D from the following location P:\Apps or from https://www.x4dglobal.com/support
-
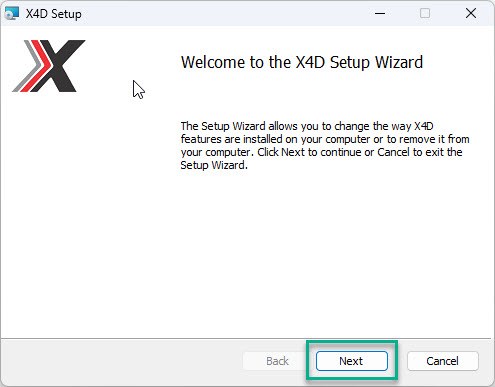
Launch the Installer.
-
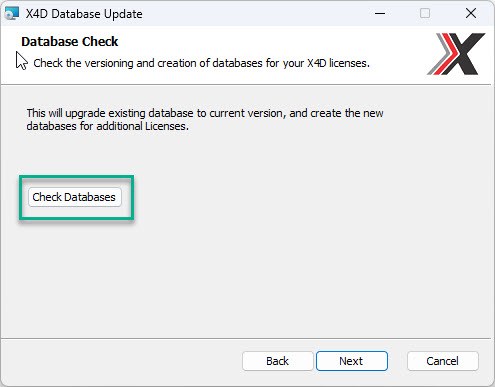
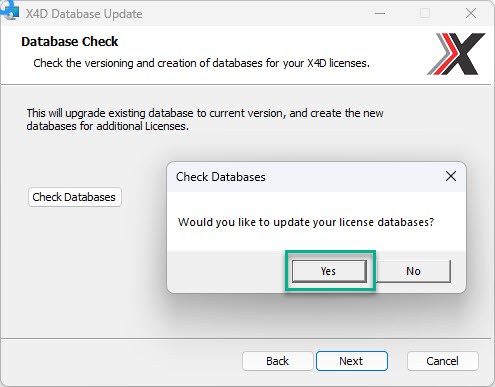
click on check databases.
-
This would pop up a window to confirm the action to update license databases. Click Yes.
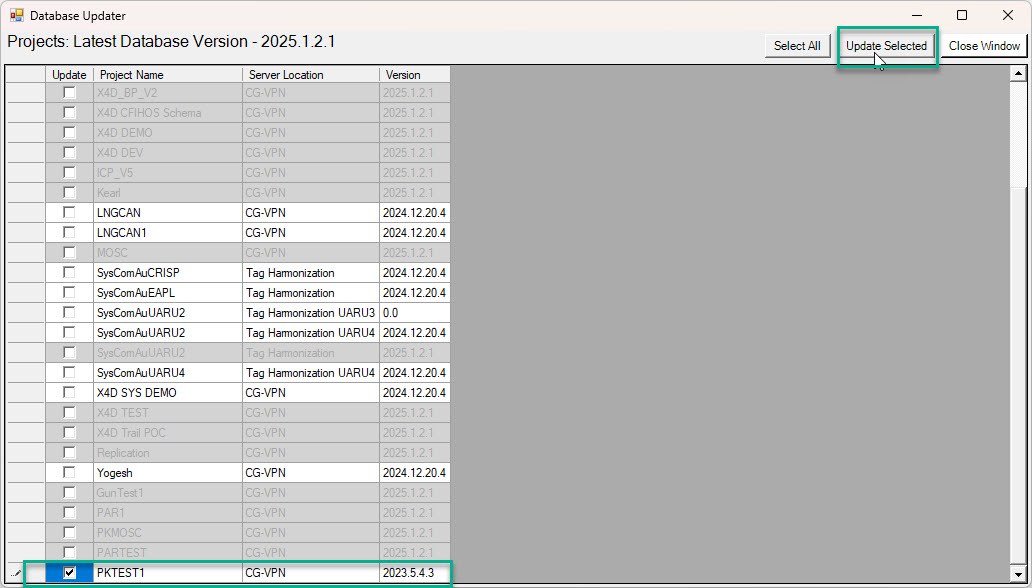
-
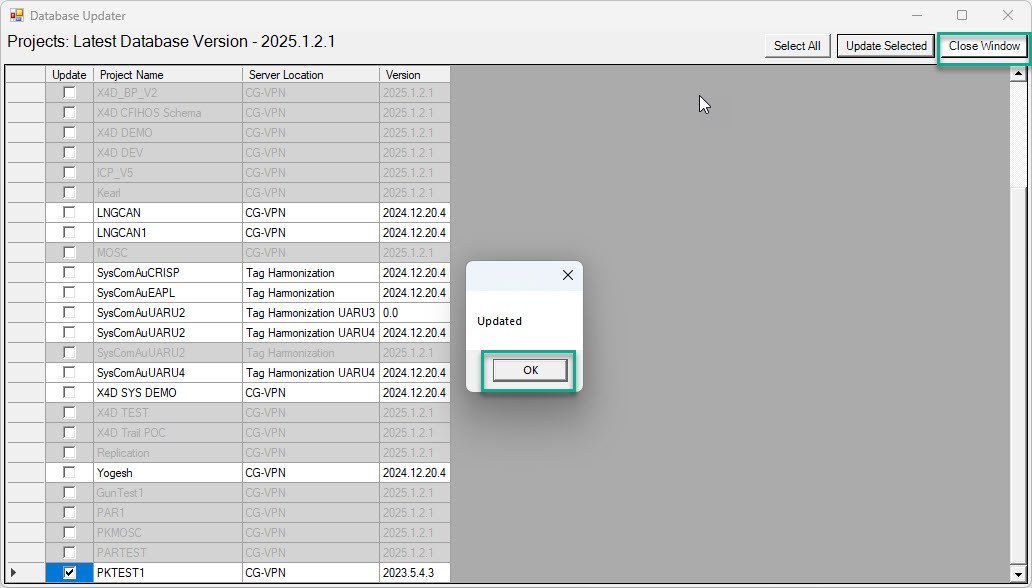
Select your Project and Click Update Selected
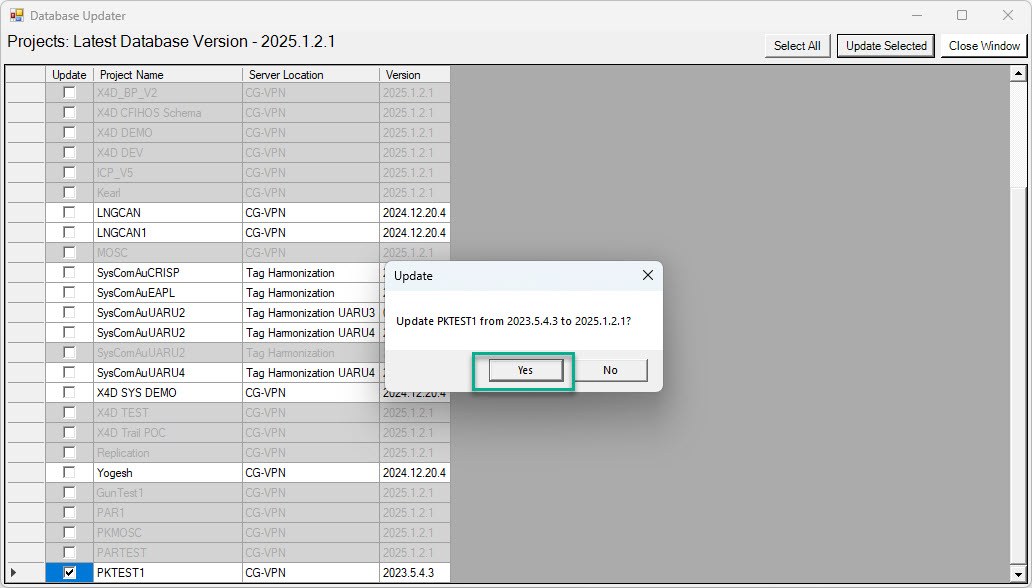
-
Click Yes to confirm the license update.
-
Click OK and then Click Close Window
-
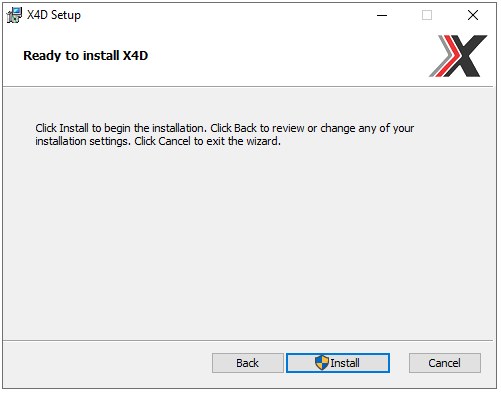
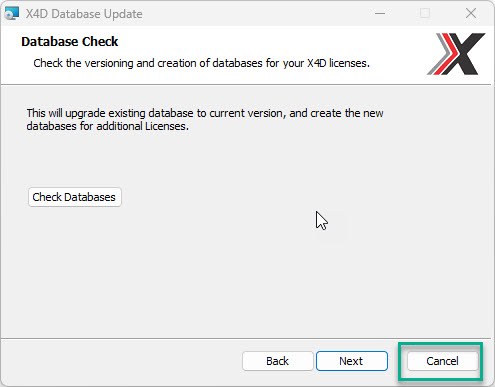
Continue by clicking Next if the latest version of X4D is not already installed.
-
Else, click Cancel if the machine already has the latest version installed.
-
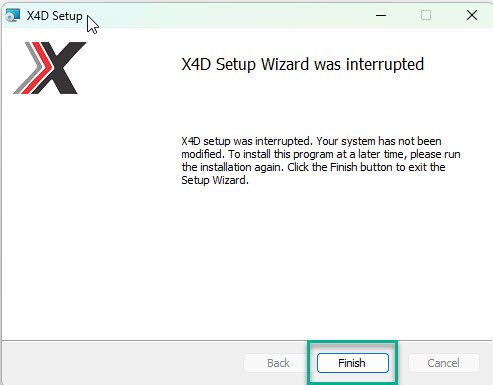
Click Finish to close the installer.
Grant Initial Permmssion to Administartor
Grant Initial Permissions to Administrator
- By default the Project Database Creator Creator is added with Administrator Role
- This Administrator can be assigned discipline an Permissions to access different modules
- Open X4D.
- Select Project and Login.
- Click on Administration
- Click on Users
- Add all the Personal Information such as Name, Surname and Email
- Check the Responsible Discipline(s)
- Add All the Available Permission(s)