SQL Server Installation
Installation Steps
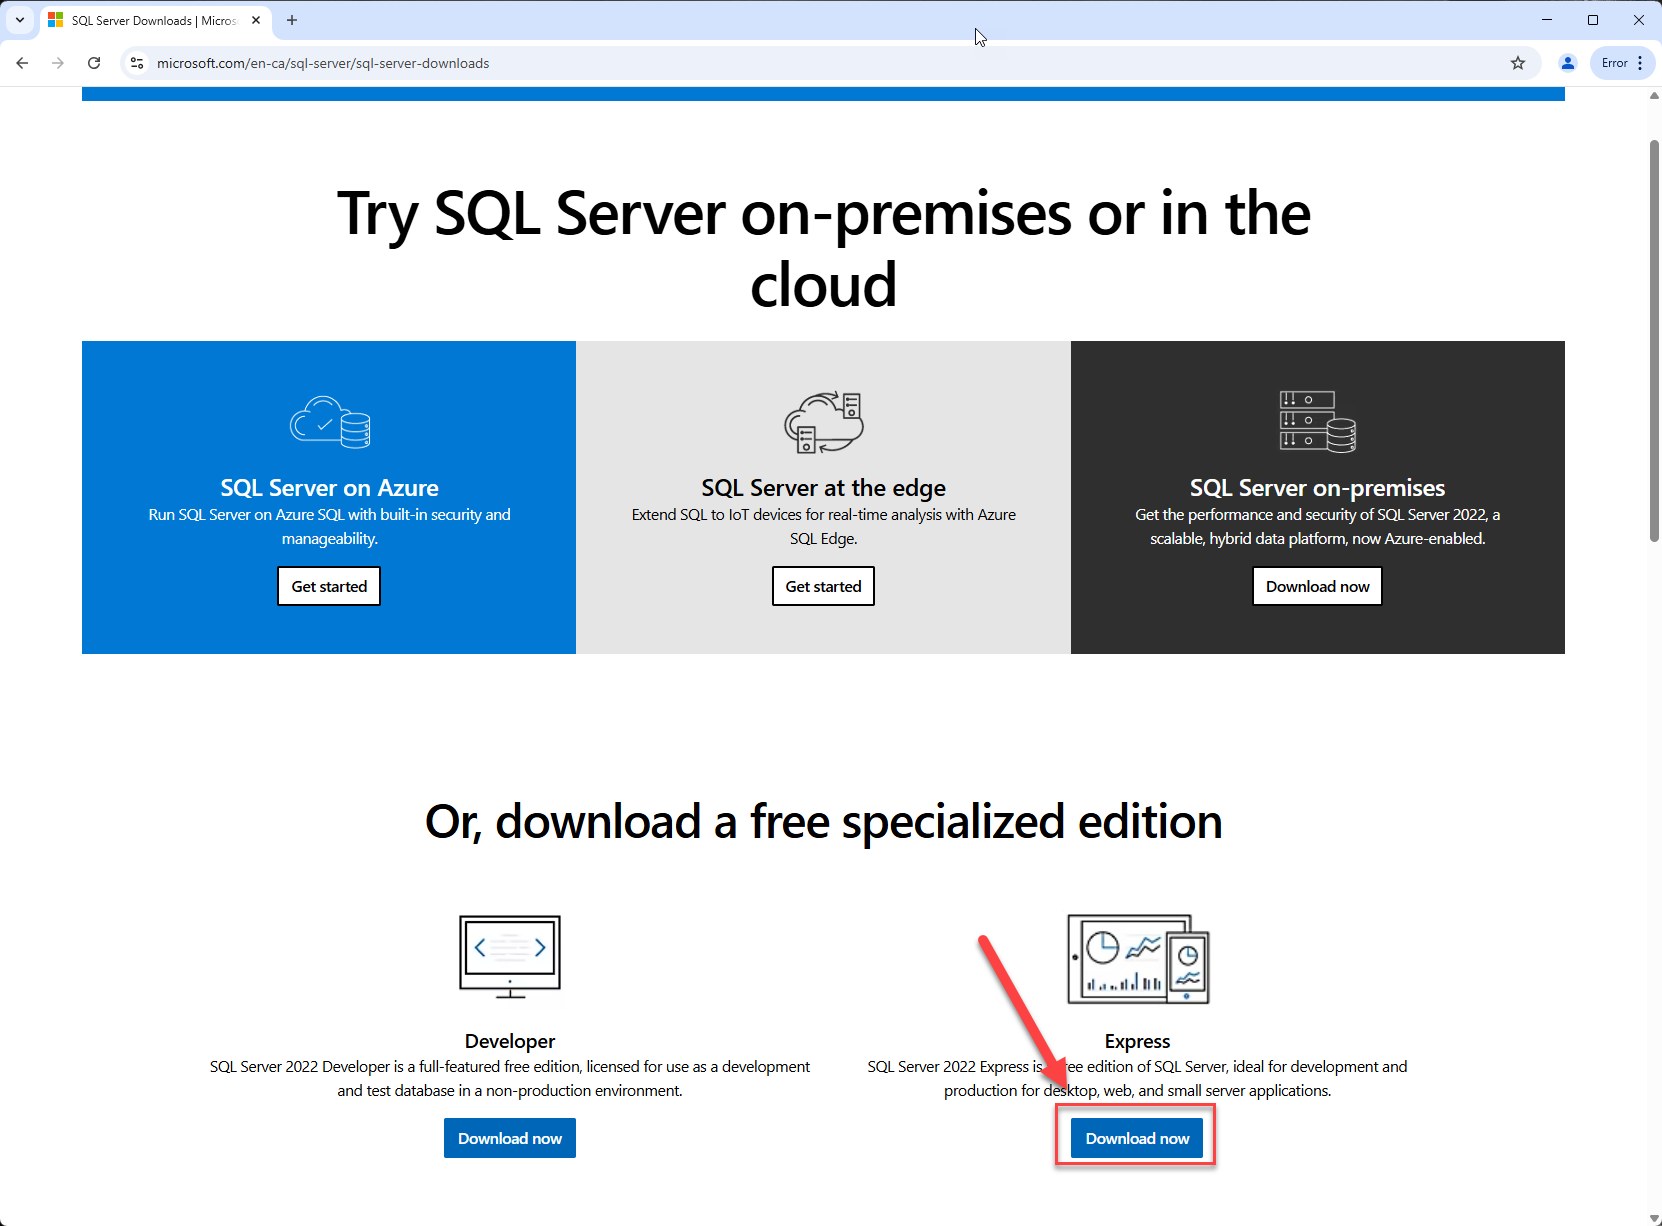
Step 1 - Download the installer
- Express or Developer: download from the Microsoft SQL Server downloads page (https://www.microsoft.com/en-us/sql-server/sql-server-downloads) and choose the Express or Developer installer.
- Standard or Enterprise: obtain the licensed media (ISO) through your Microsoft volume licensing agreement or partner.
https://www.microsoft.com/en-us/sql-server/sql-server-downloads
- 1 SQL Server Standard or Enterprise Edition: Requires a valid license and is the most suitable option for production environments.
- 2 SQL Server Express 2025 Edition: Available free of charge. It supports databases up to 50 GB in size and is limited to approximately 1.4 GB of memory usage by the Database Engine.
- 3 SQL Server Developer Edition: Includes all Enterprise Edition features with no technical limitations and is recommended for Development and Test environments only. It is not licensed for production use.
Step 2 - Run the installer
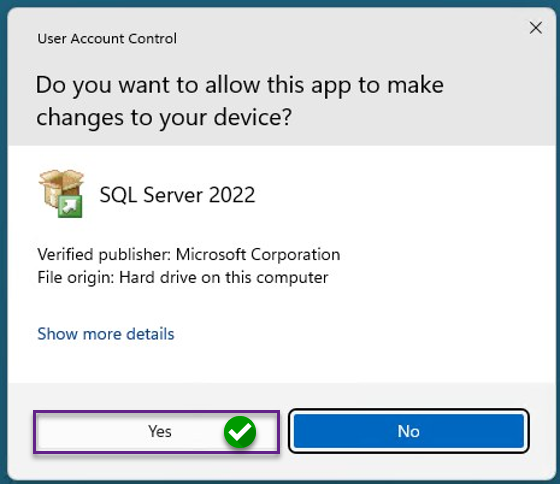
- 4 Click Yes to continue.
- 5 This example demonstrates the steps using SQL Server Express 2022. However, the installation and configuration steps are essentially the same for all SQL Server versions.
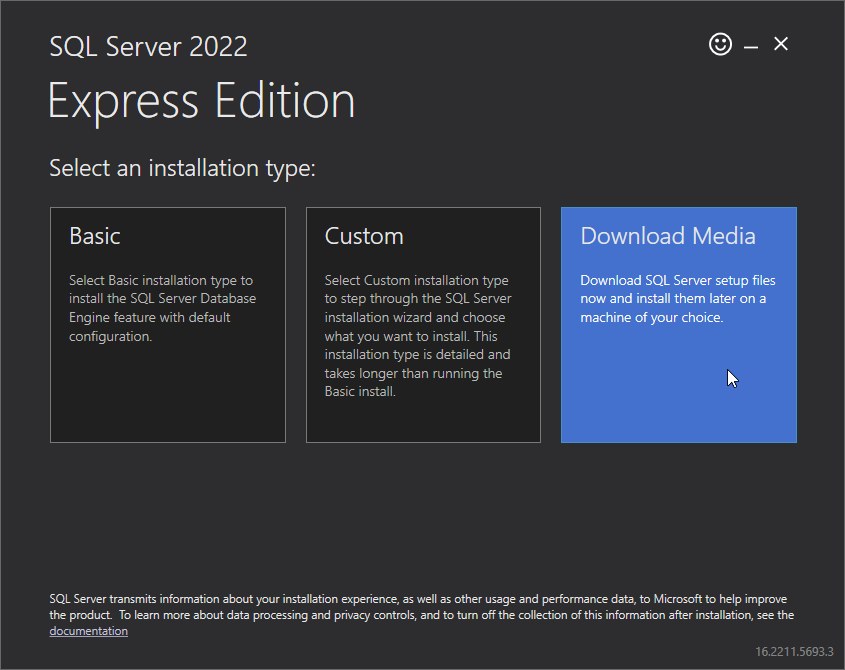
- 6 The Download Media option is preferred.
- 7 To conserve disk space, the downloaded installation media can be deleted after the installation is completed.
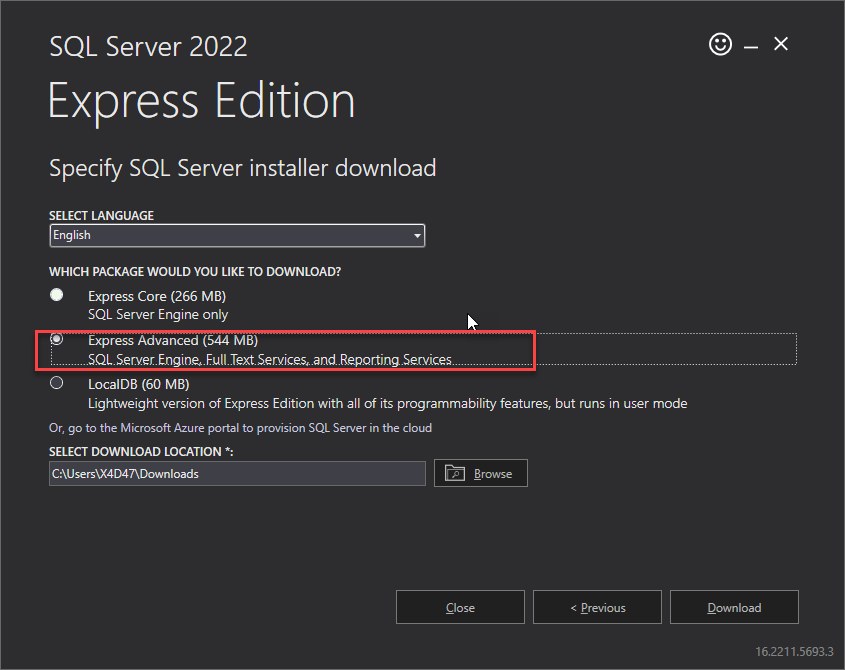
- 8 For SQL Server Express 2025, select the Express edition only.
- 9 For SQL Server 2022 and earlier versions, the Express Advanced Services edition can also be used if additional features are required.
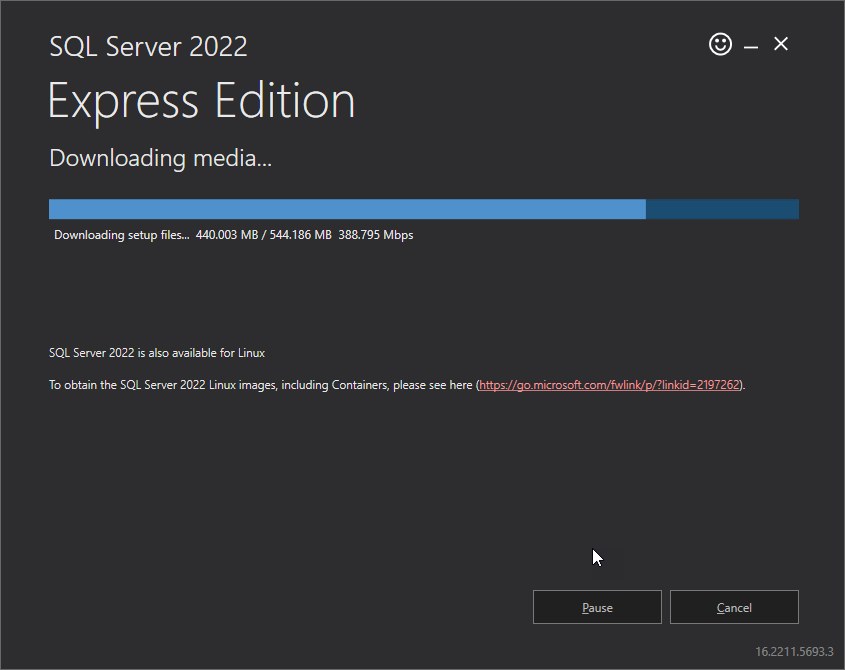
- 10 Wait for the installation media download to complete.
- 11 Select the Custom installation option, choose a location for the extracted installation files, and click Install.
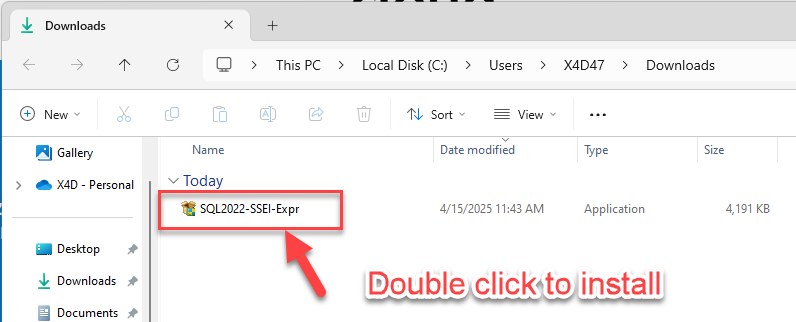
- 12 Run the downloaded installer
Step 3 - Start a new installation
Notes:
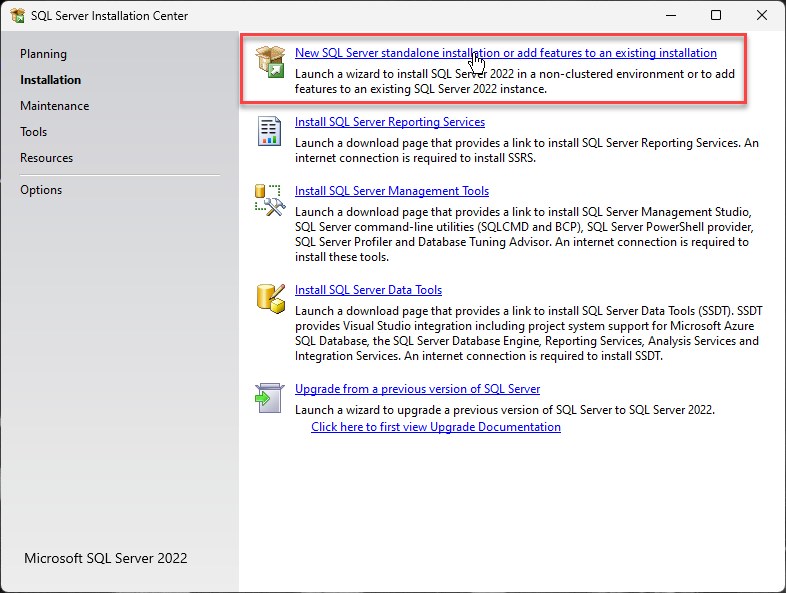
- Use New SQL Server standalone installation
Notes:
- In the SQL Server Installation Center, click “New SQL Server stand-alone installation or add features to an existing installation.”
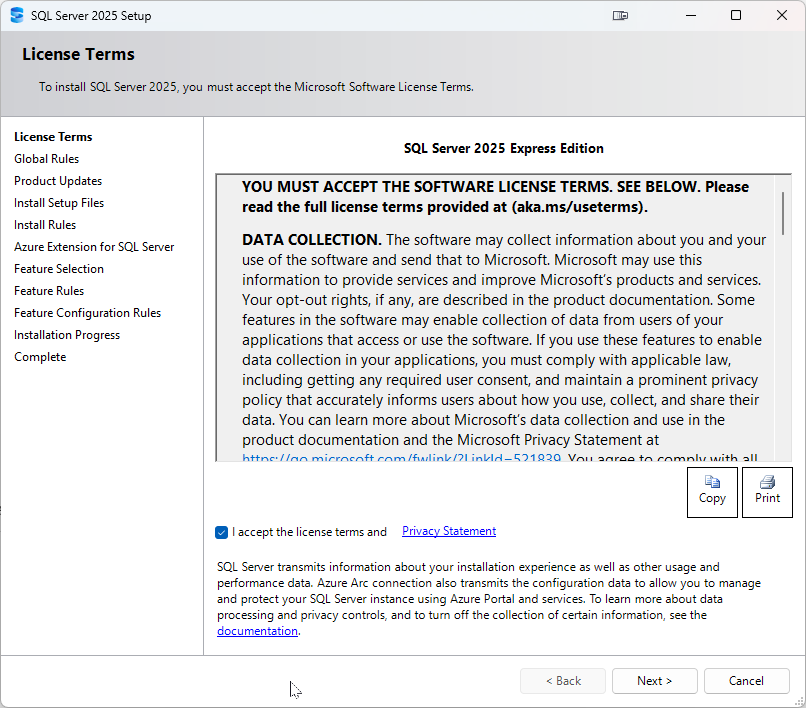
- Accept the license terms. For Express or Developer the edition is preset; for Standard or Enterprise, enter the product key or select the edition.
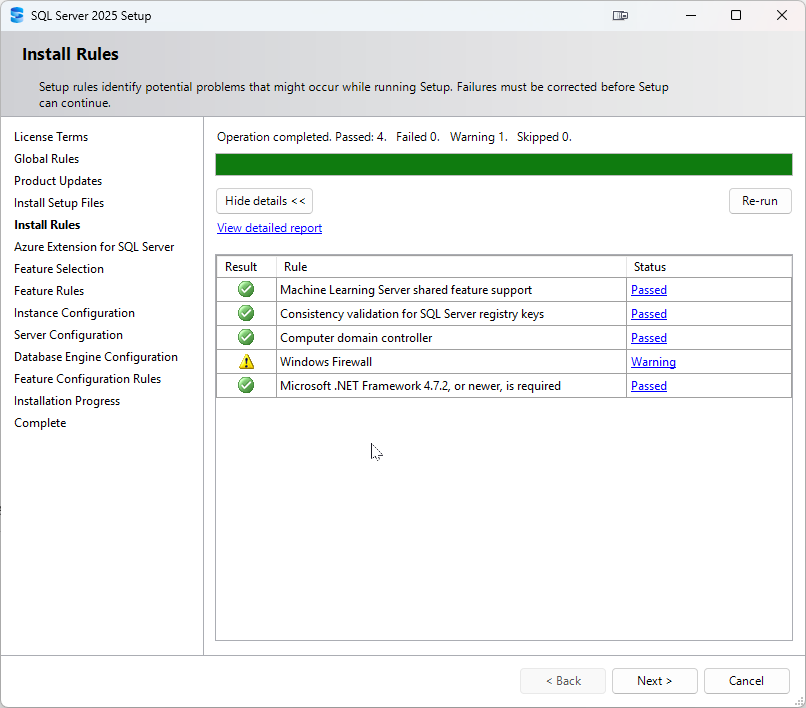
- 16 Check the Install Rules as above
- 17 Windows firewall warning we will fix in later part of section
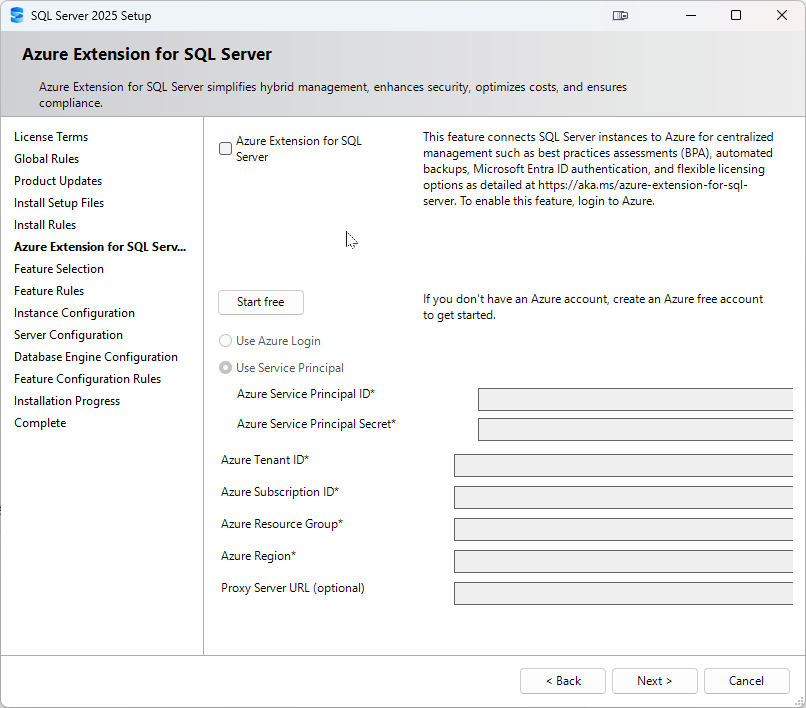
- 18 No need for an Azure Extension for SQL Server
Step 4 - Feature selection
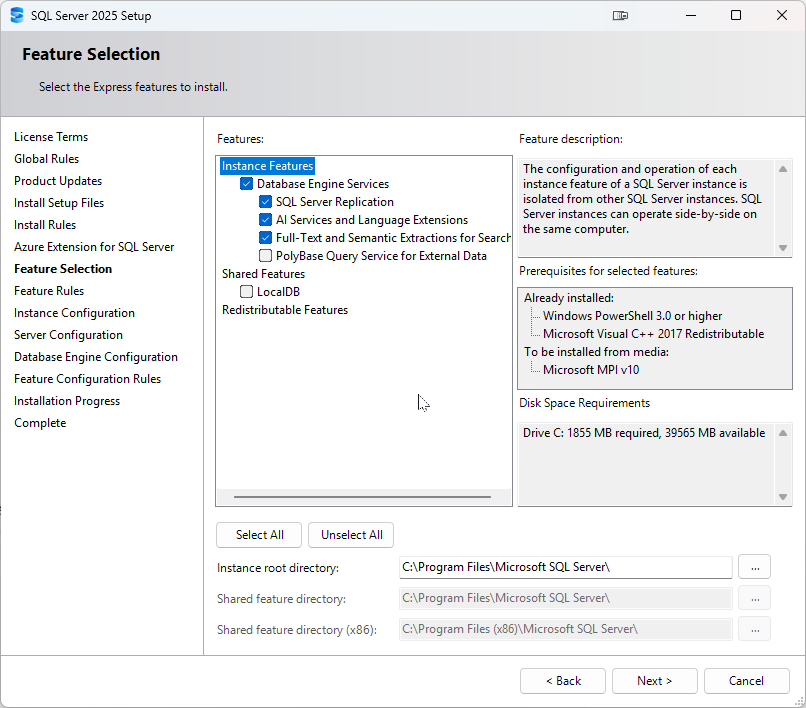
- 19 Select Database Engine Services.
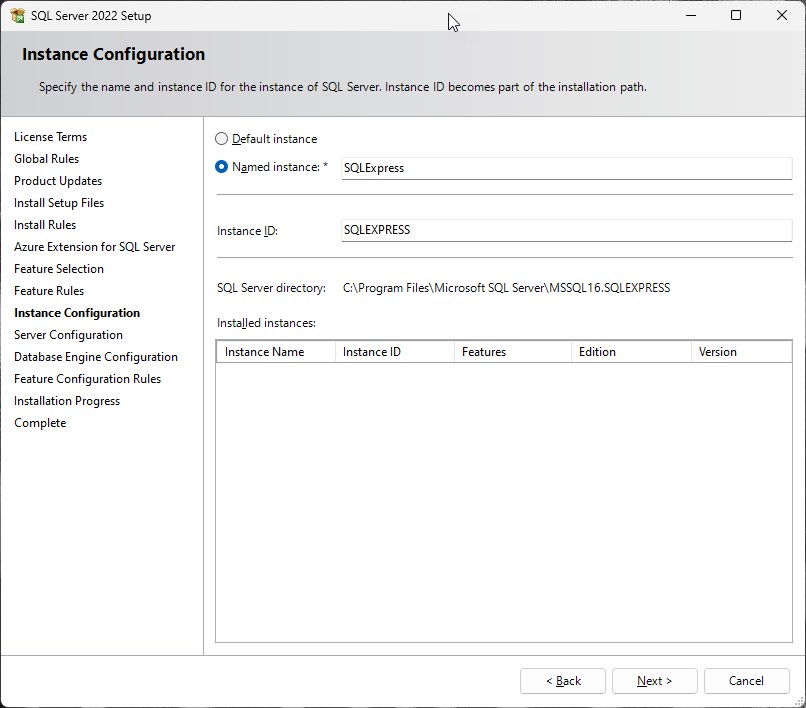
Step 5 - Instance configuration
Notes:
- Accept the default instance (SQLEXPRESS for Express, MSSQLSERVER for other editions) or specify a named instance.
Step 6 - Server configuration
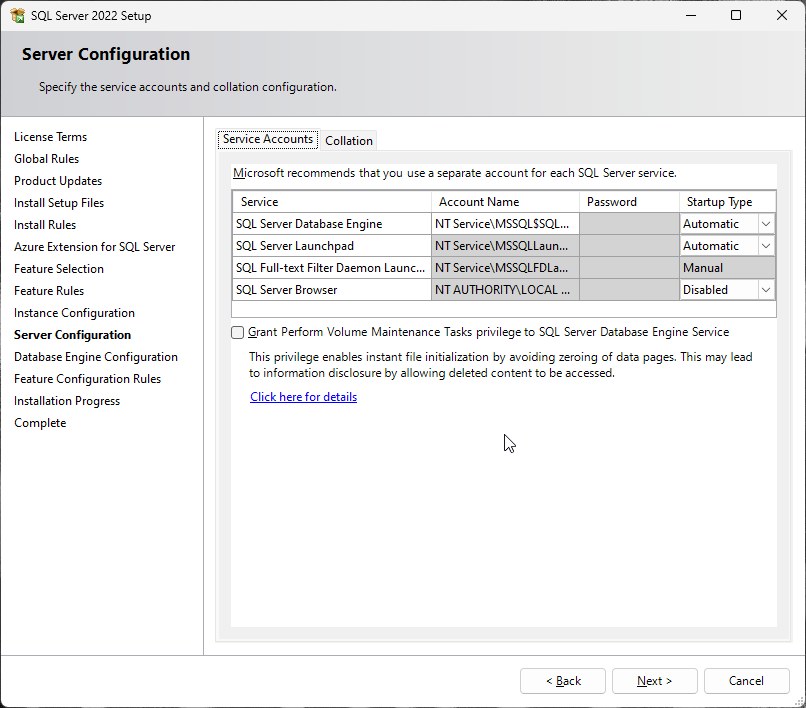
Notes:
- Set the SQL Server Database Engine service to run under NT AUTHORITYSERVICE, or provide a dedicated service account for production.
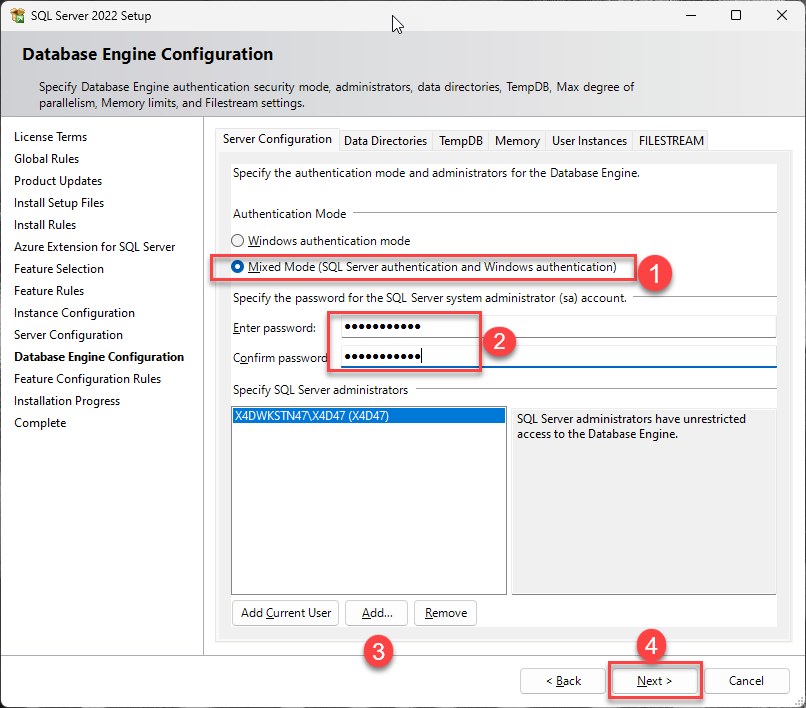
Step 7 - Database Engine configuration
Notes:
- Authentication: select Mixed Mode (SQL Server and Windows authentication), set a strong password for the sa account, and add the current Windows administrator as a SQL Server administrator.
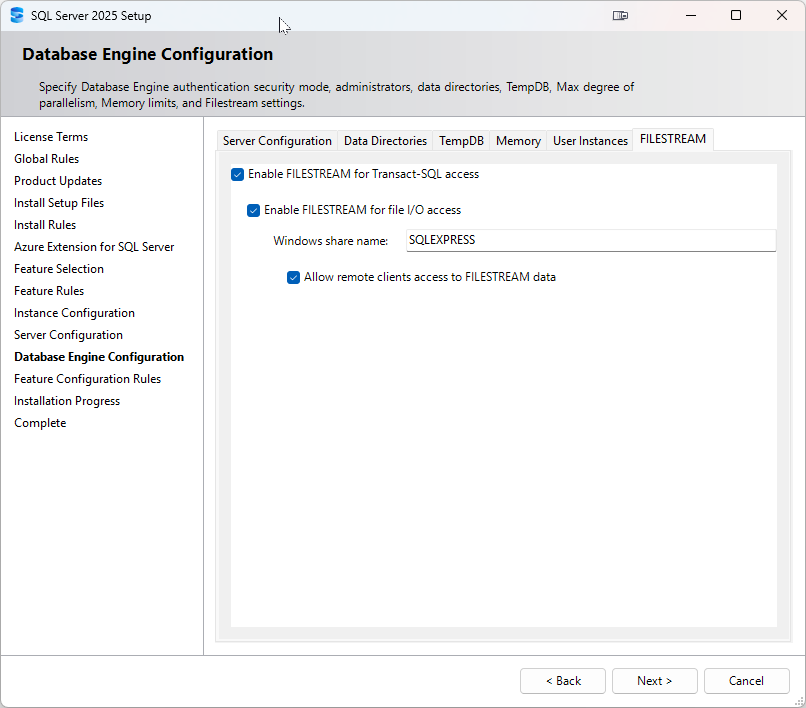
Notes:
- Go to the FILESTREAM tab and enable FILESTREAM for Transact-SQL access. This allows SQL Server to manage FILESTREAM data.
- Enable FILESTREAM for file I/O streaming access. This allows applications to access files directly through Windows.
- Enable Allow remote clients to access FILESTREAM data. This allows network users and applications to access FILESTREAM data.
Step 8 - Complete the installation

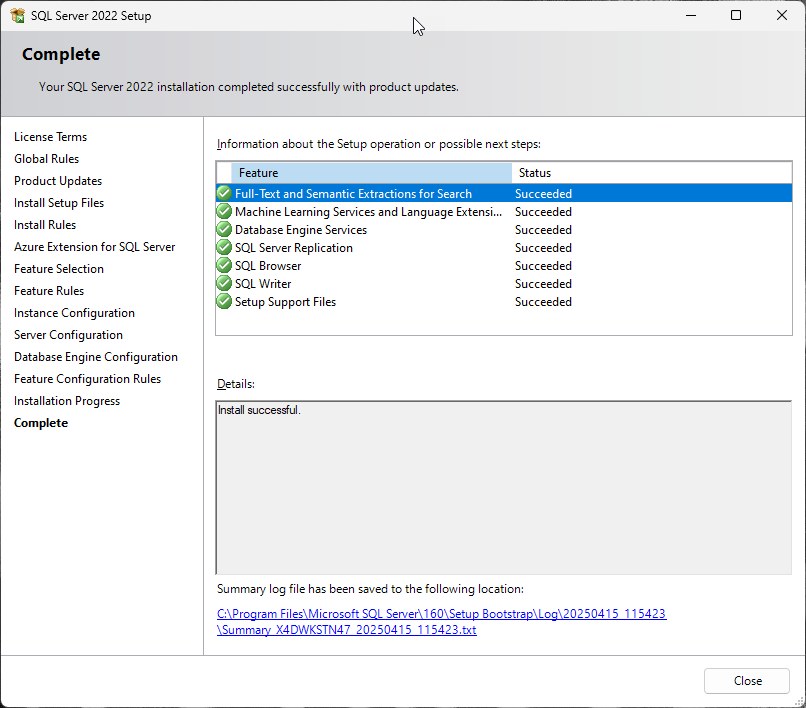
Notes:
- Click Next, then Install, and wait for the installation to be completed.
- Ensure that the SQL Server instance is installed with FILESTREAM enabled.
Step 9 - Verify FILESTREAM
- Open SQL Server Management Studio (SSMS) and connect to the instance.
- Confirm the FILESTREAM access level:
Note: EXEC sp_configure 'filestream access level';
- If the value is 0, enable it and reconfigure:
Note: EXEC sp_configure 'filestream access level', 2;
RECONFIGURE;
- Restart the SQL Server service for the change to take effect.
Step 10 - Network Configuration
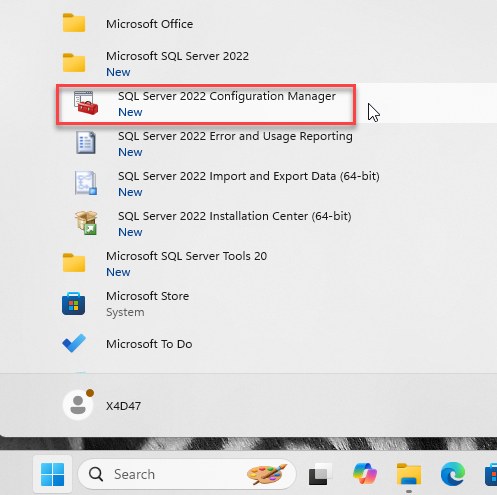
Notes:
- Open SQL Server Configuration Manager.

Notes:
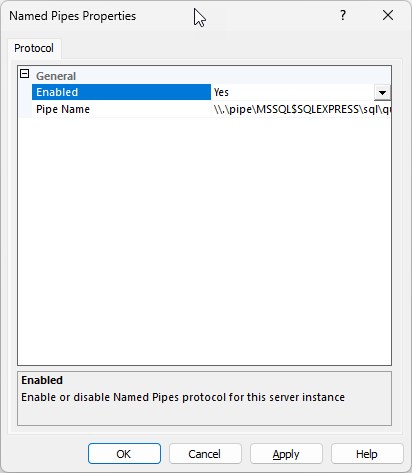
- Under SQL Server Network Configuration, enable TCP/IP and Named Pipes.
Notes:
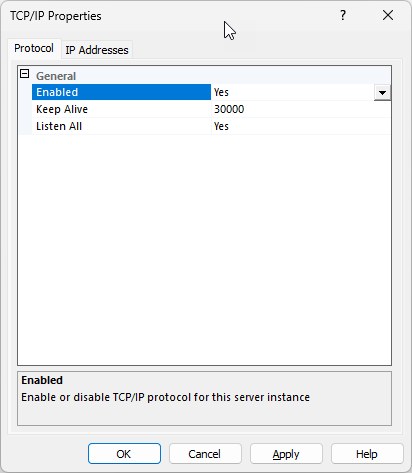
- Enable TCP/IP and Named Pipes.
Notes:
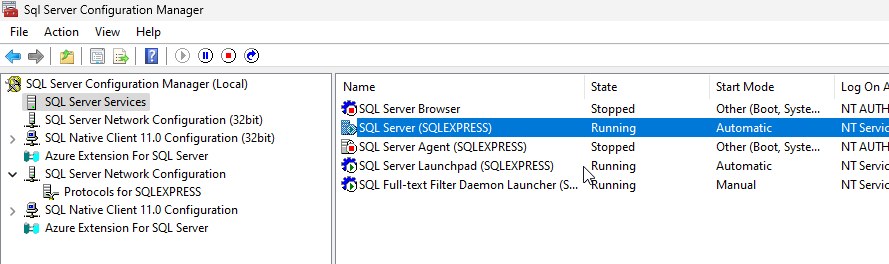
- Restart the SQL Server service.
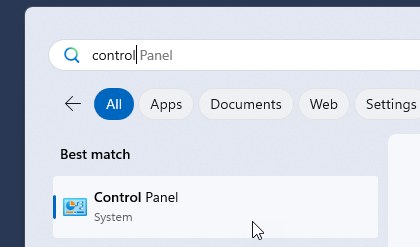
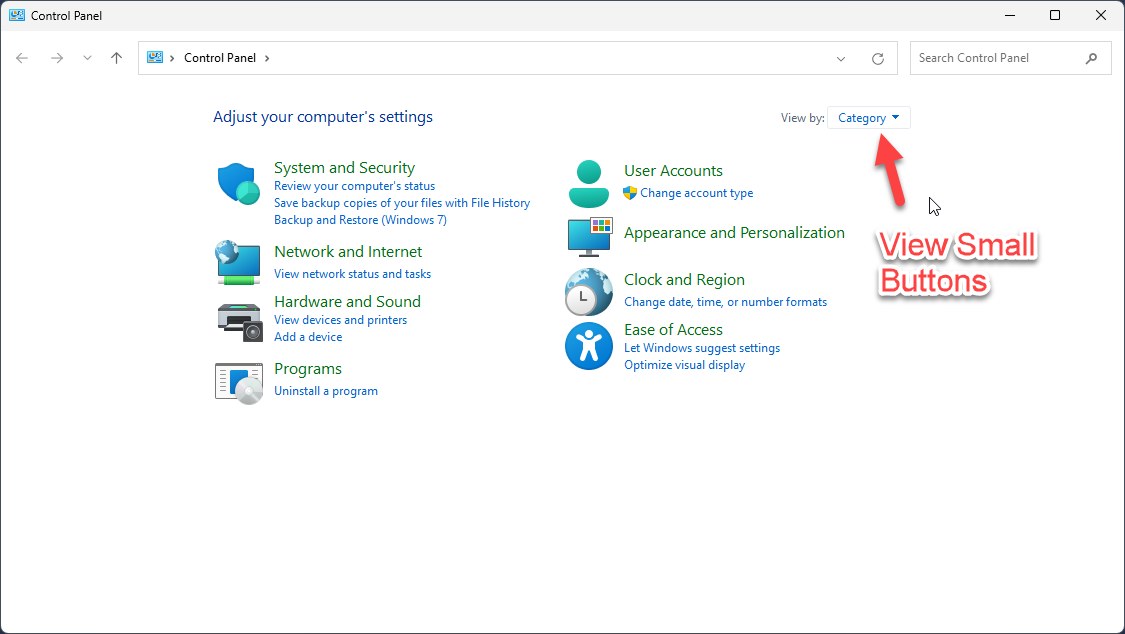
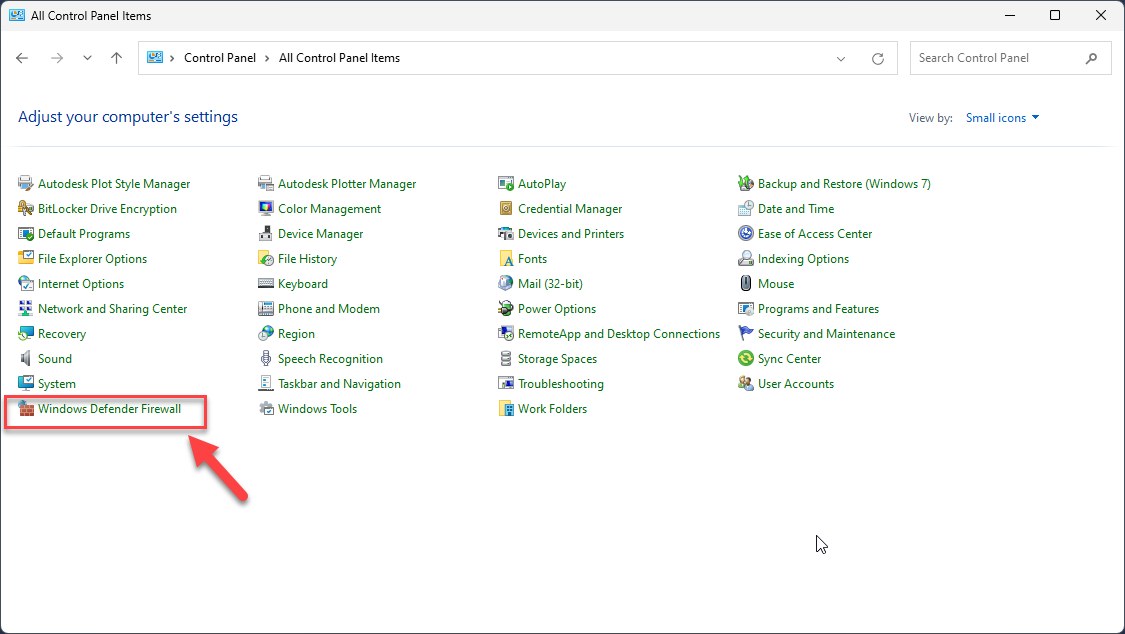
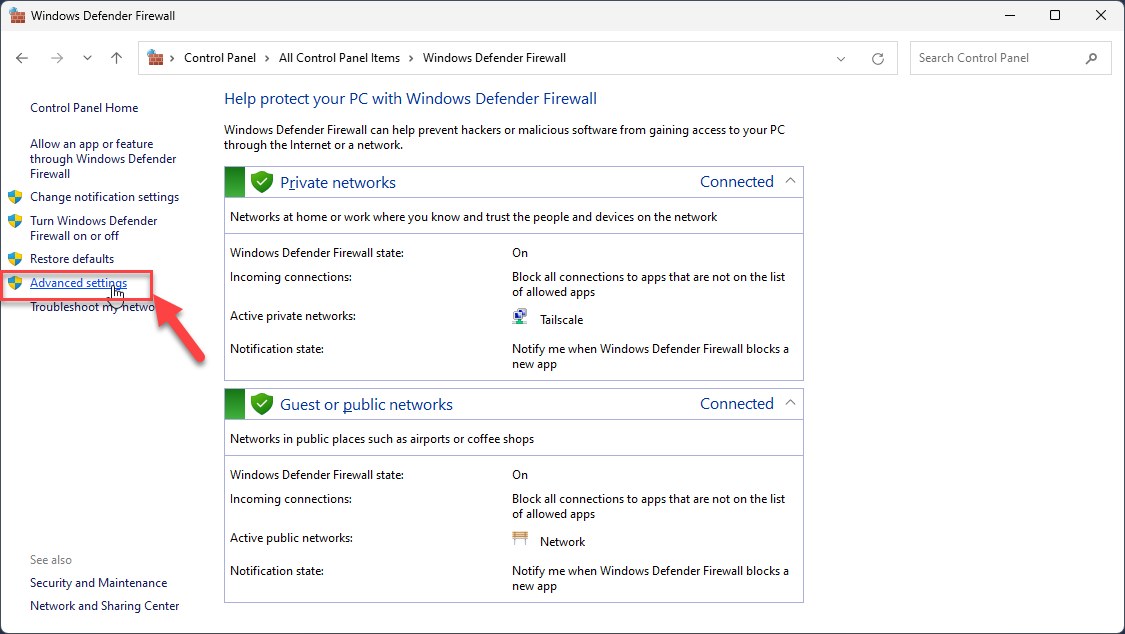
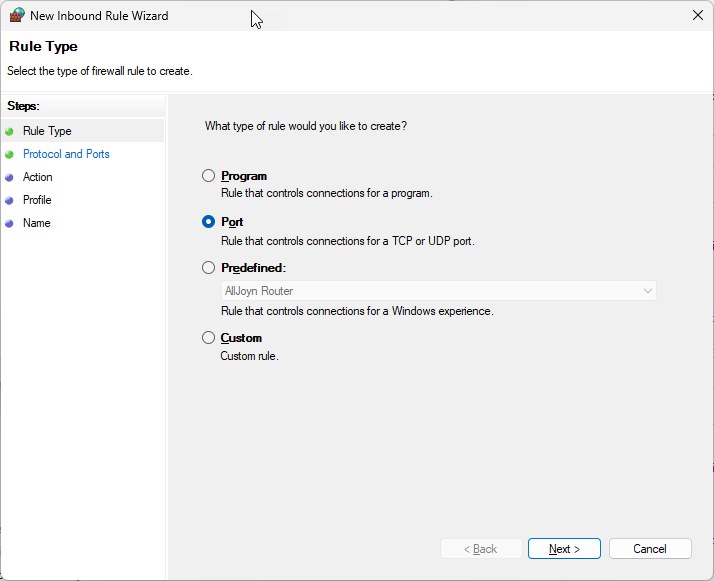
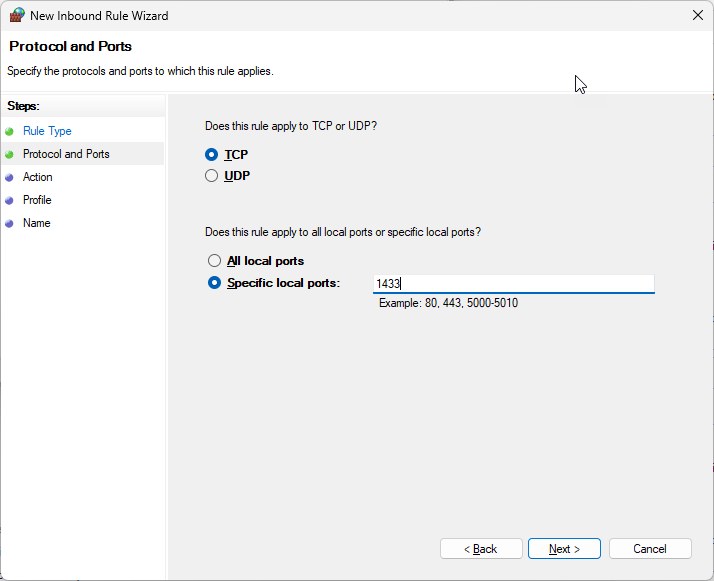
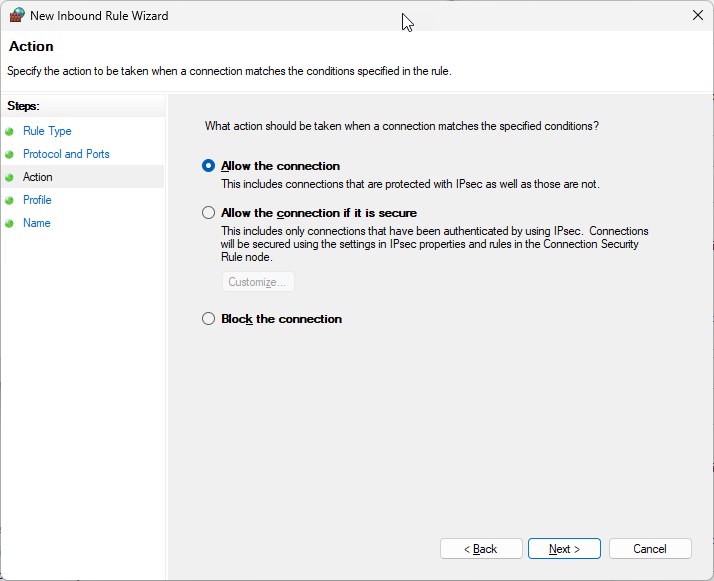
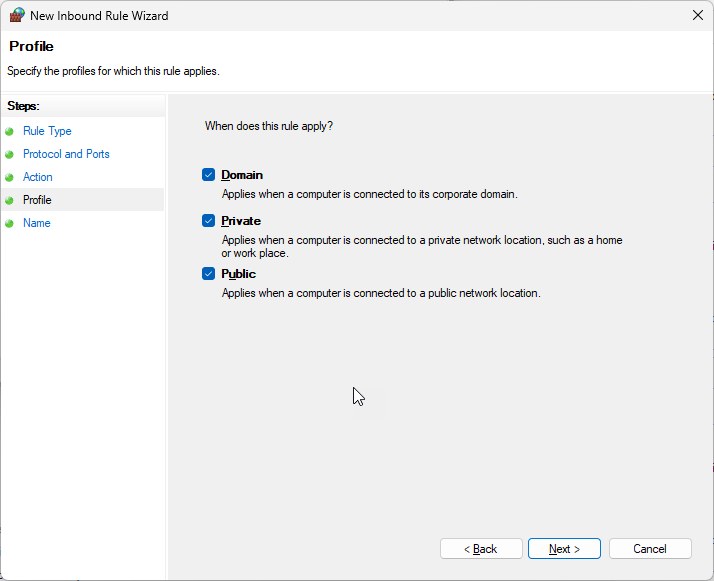
Step 11 – Firewall Configuration
Step 12 – Install SQL Server Management Studio (SSMS)
Download and install SSMS separately (it is no longer bundled with the SQL Server installer).
Caption: Download SSMS
Notes:
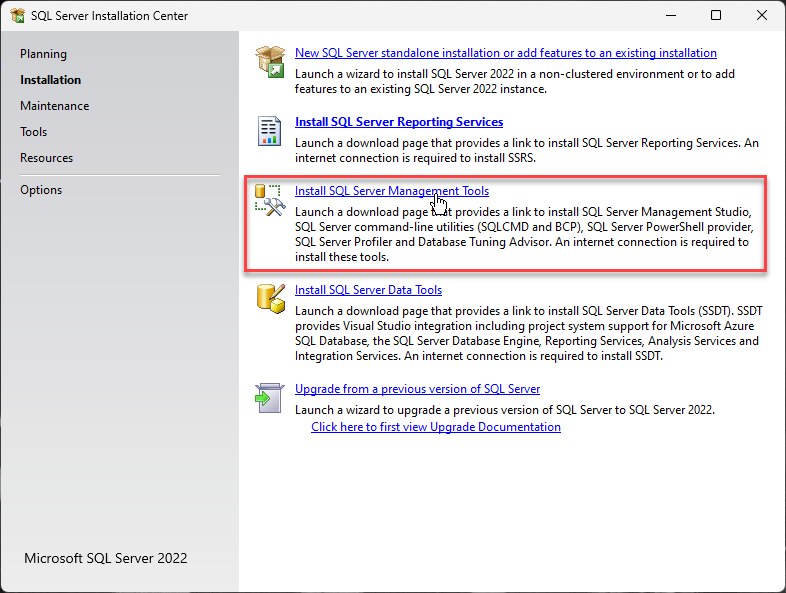
- Select Install SQL Management Tools Link can be clicked from SQL Installer
- Alternatively, SSMS can be searched on Google to find the installer
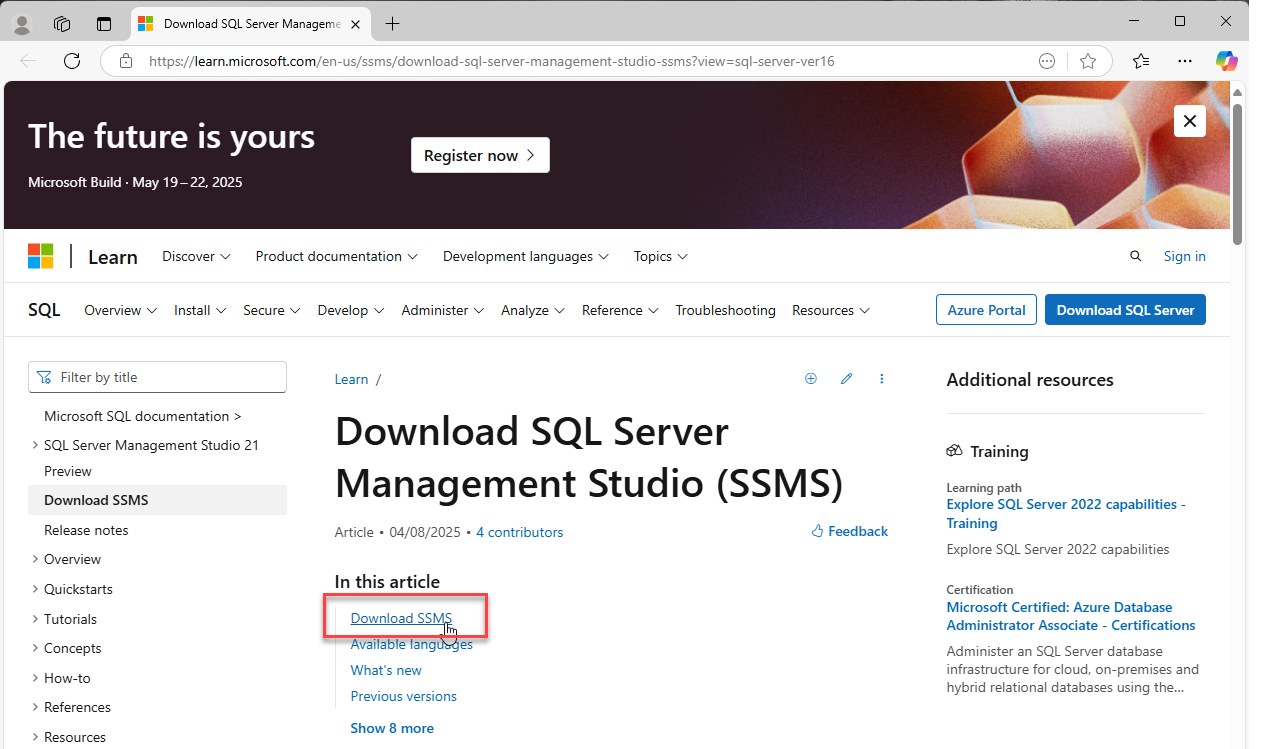
Caption: Download Screen for SSMS
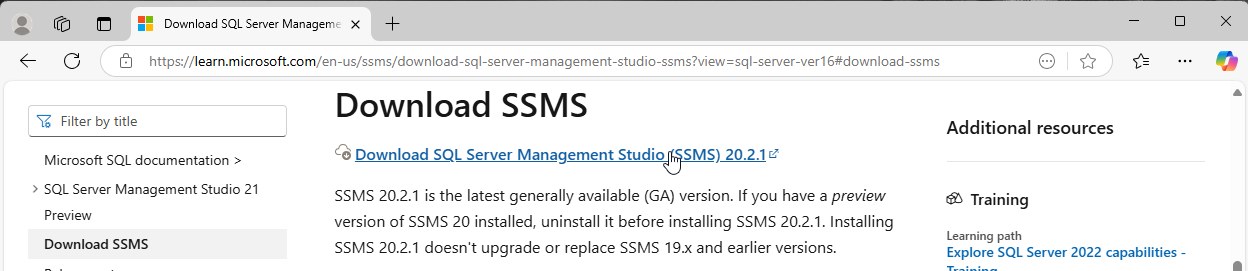
Caption: Download the Current Version for SSMS
Caption: Run the Installer
Caption: Leave Default Location for the Installation.
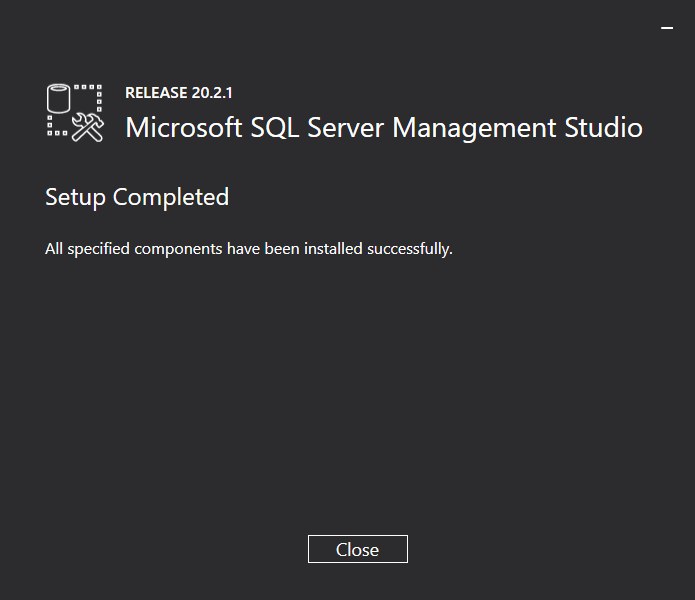
Caption: SSMS Install Completion Screen


 { data-title="Connect the SQL instance" data-description="<div class='x4d-lb-notes'><span class='x4d-marker'>1</span> Generally Server and Instance name are usually filled in automatically<br><span class='x4d-marker'>2</span> If default installation is not used, provide the required Inssstnace Name and choose windopws or SQl Authntication as required<br><span class='x4d-marker'>3</span> Accept “Trust Server Certificate,” or for production install a CA-issued certificate (for example DigiCert).<br><span class='x4d-marker'>4</span> SSMS connects and shows the server in Object Explorer, confirming the installation.<br><span class='x4d-marker'>5</span>
 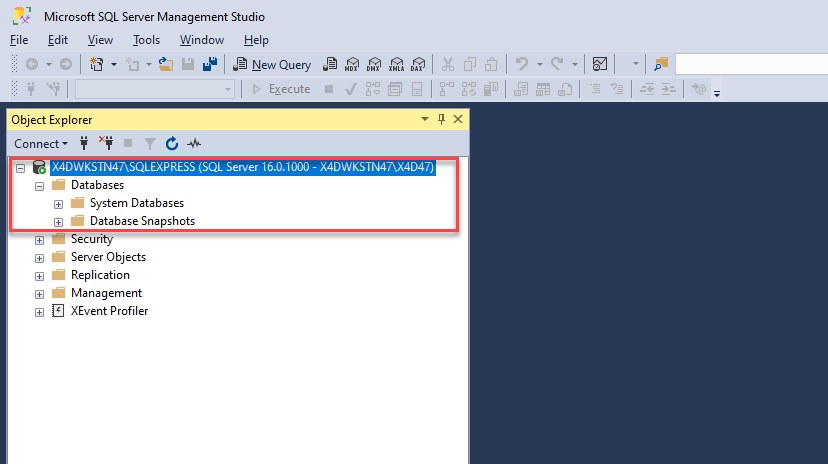 </div>" }
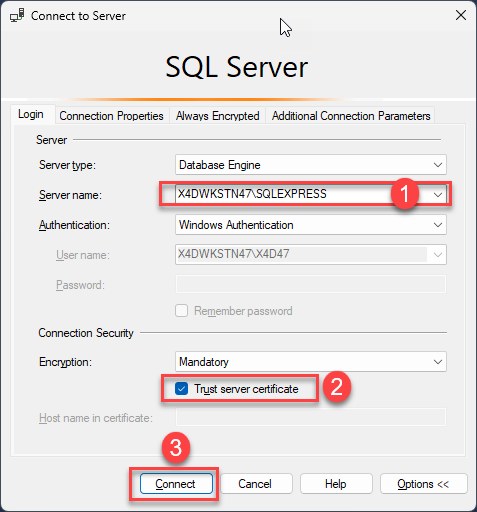
- 1 Generally Server and Instance name are usually filled in automatically
- 2 If default installation is not used, provide the required Inssstnace Name and choose windopws or SQl Authntication as required
- 3 Accept “Trust Server Certificate,” or for production install a CA-issued certificate (for example DigiCert).
- 4 SSMS connects and shows the server in Object Explorer, confirming the installation.
- 5
Recommended Configuration Practices
- Place TempDB on fast SSD or NVMe storage.
- Configure regular database backups.
- Schedule index rebuilds and statistics updates.
- Set the SQL Server maximum memory appropriately for the host.
- Monitor database growth to avoid storage saturation.
Typical Deployment Profiles
Small deployment
- SQL Server Express, 8-core CPU, 32 GB RAM, NVMe storage
Standard production deployment
- SQL Server Standard, 16-core CPU, 64 to 128 GB RAM, NVMe RAID storage
Large enterprise deployment
- SQL Server Enterprise, 24 or more core CPU, 192 GB RAM or higher, enterprise NVMe storage arrays
Document purpose: standard installation and sizing guidance for X4D SQL Server deployments. Adjust specifications based on data volume, concurrent users, reporting load, and growth expectations.